

Oleeo can be used to manage your recruitment agencies. If you have access to this functionality, you can add recruitment agencies to the system and post opportunities to them. Recruitment agents can then log in to the agency interface and submit applications to the posted opportunities.
PROCESS OVERVIEW
Before you can post opportunities to an agency, you must first add the agency to the system.
There are three parts to this process:
- Create Agency: Add the agency to the system.
- Add Agency Users: Create individual accounts for the agents at the recruitment agency.
- Add Contracts to the Agency: Agencies are often divided into offices or locations. For instance, an agency may have offices in London, Leeds, and Liverpool. When you create a contract, you can give agents access to the contract designed for a specific section of the agency.
- Add Agency Users to Contracts: When an agency user logs in to the portal, they will only be able to view opportunities posted to the contracts that they have been added to.
Create agencies in Live: The Agency, Agency Users, and Contracts lists on the Config and Live environments are independent. Therefore, if you are creating a new agency, this should be done in the Live environment.
STEP 1: CREATE AGENCY
The first part of the process is to add the agency to the system. You will be asked to enter the agency's name and can also add a description.
To add a new recruitment agency:
- From the left-hand menu, go to the Agencies > Agencies.
- In the Agency List toolbar, click the New Agency button.
- On the new page, enter the Name of the new agency and an optional Description. The description is for internal use and is not visible to the agency users.
- Click Save to create the new agency.

STEP 2: ADD AGENCY USERS
Once you have created an agency, you can add the recruiters who work for that agency.
Create an account for each individual recruiter: Shared profiles are not advised.
After you add a new user, they will automatically be sent their login details.
To add a recruitment agent to an agency:
- From the left-hand menu, go to the Agencies > Agency Users.
- In the Agency Users toolbar, click the New Agency User button.
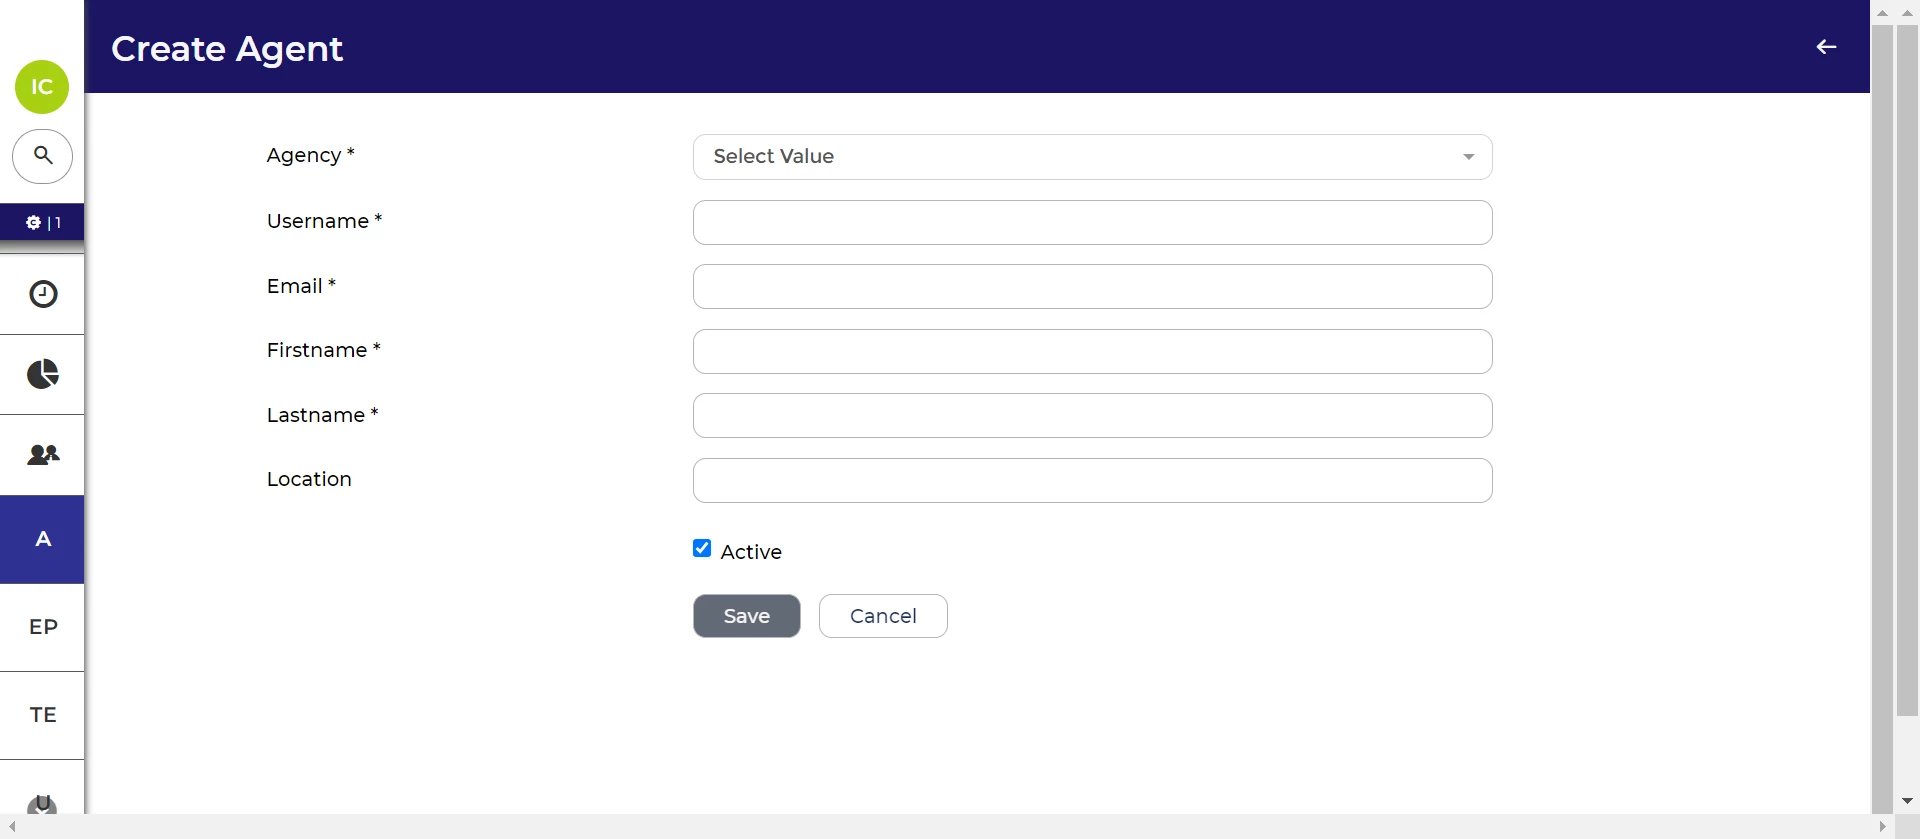
- You will be asked to enter the following information about the new agency user:
- Agency (mandatory) - Select the agency that this user needs access to.
- Username (mandatory) - The username that you enter should be unique to the new user. We recommend that you follow the same format for all usernames. For example, you could use the agency recruiter's first name and last name.
- Email (mandatory) - Password reset emails and notifications regarding new opportunities will be sent to this address.
- Firstname (mandatory)
- Lastname (mandatory)
- Location (non-mandatory) - This free text field allows you to specify the agents location or address. Your list of agency users table layout may include the ‘Agency Location’ column.
- Active - The recruitment agent will only be able to login to the system if this checkbox is ticked.
- Once you have completed these details, click Save. You will be returned to the list of recruitment agents.
- Providing the ‘Active’ checkbox is selected, the newly added recruitment agent will be sent an email that contains:
- Their username and password.
- A link to the agency portal. This will typically be in the following format: https://[your-system].tal.net/vx/agent/login
Remember to add the agent to the contract: If you are adding a new agent for an existing contract, remember to add the user to the contract.
STEP 3: ADD CONTRACTS TO THE AGENCY
Once you have created a new agency and the agency users for that agency, you should create the agency's contracts.
Contracts are a way of splitting agencies into divisions or offices. For example, an agency could have offices in London, Manchester, and Leeds. Alternatively, an agency could have divisions such as Finance, Construction, and Retail.
To create a Contract:
- From the left-hand menu, go to Agencies > Contracts.
- In the Agency Contracts toolbar, click the New Contract button.
- You will be asked to enter the following information about the new contract:
- Name (mandatory) - Include the agency name in the contract’s name. For example "Star Recruitment - Leeds" or "Star Recruitment - Finance". This will make it easier to identify the contract when you come to post an opportunity to it.
- Agency (mandatory) - Select the agency to which this contract will be attached.
- Application Centre (mandatory) - Choose the application centre that submitted candidates will be taken to if they login to view their application (the option will only appear if you have multiple application centres). For example, you might have separate application centres for internal and external candidates.
- Category (non-mandatory) - We can set up contract categories on your system. Usually, the categories are types of opportunities. This is purely for your own information and is not displayed to the agency. If there are no categories set up on your system, you can leave this field blank.
- Apply Rule (non-mandatory) - Agency apply rules prevent agencies from submitting candidates who are already in your system. Oleeo can configure additional restrictions if required.
- Summary / Pricing summary (non-mandatory) - These fields allow you to add additional internal information about the contract. This information is not visible to agency users.
- Description (non-mandatory) - The description entered here will be visible to agents in the agency interface.
- Once you have entered the relevant details, click Save.
Importance of selecting an Apply Rule: If you do not select an ‘Apply Rule’, the agency will be able to submit candidates who have already been added to to your system.

STEP 4: ADD AGENCY USERS TO CONTRACTS
When an agency user logs into the portal, they will only see opportunities posted to the contracts they're assigned to.
To add agency users to a contract:
- Once the contract has been saved, locate the Agency Users field on the contract’s form.
- Select the recruitment agents that you want to add. This is a multi-select field.
- Click Save at the bottom of the form to add the users.
If you need to add agency users to a previously created contract, you'll need to navigate to the contract and then click ‘Edit’ in the contract’s toolbar.

ATTACH FILES TO CONTRACTS (OPTIONAL STEP)
You can attach files to a contract that will be shared with the agency and visible to users in the agency interface. For example, you could add pricing agreement between your organisation and the agency.
To attach a file:
- Once the contract has been saved, locate attach files section at the bottom of the contract’s form.
- Click Add Local File.
- You will then be able to choose a file.
- Click Save at the bottom of the form to upload the file.

NEXT STEPS
