


WHAT IS THE TIP?
Make your table layouts work for you with the following helpful tips on table layout personalisation.
Layout selection
💡 Your system will have been configured with a selection of ready made table layouts so you can quickly select a view that will return relevant information to the task you are working on, at any given time.
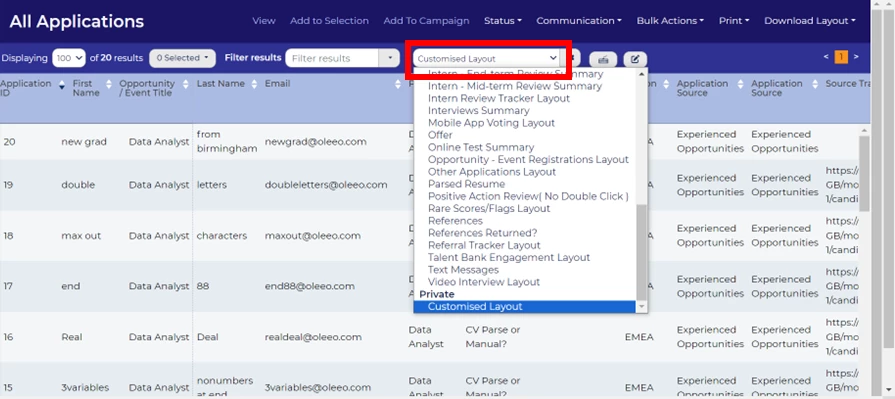
If the pre existing table layouts do not provide you with what you need, you can simply create your own.
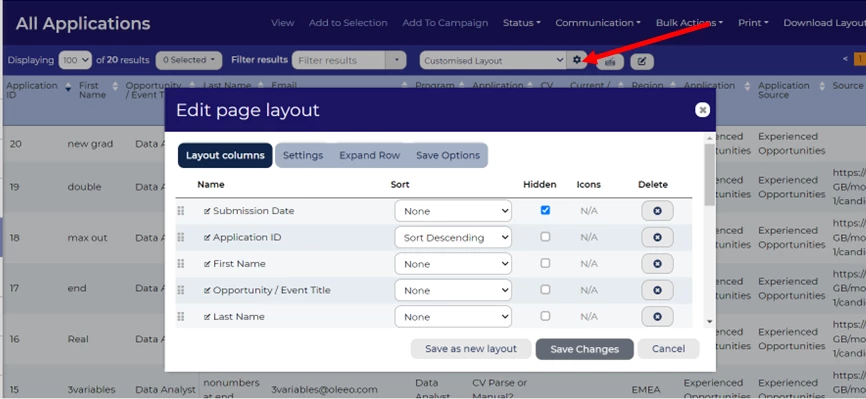
Customise your layout
💡 There are a myriad of customisation options for your personal table layout. Click the cog to edit your table layout.
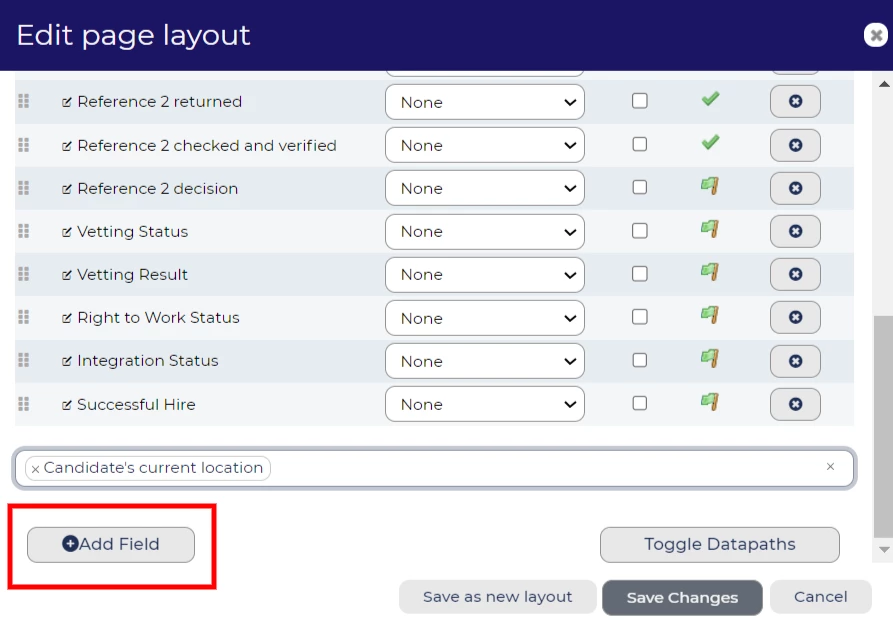
‘Add Field’
💡 Add additional columns of data that you require to your table layout. If you cannot find the item you are wanting to add, speak to your Supported User or System Admin.
DO NOT FORGET: when adding a new field to a layout, click ‘Add field’ before pressing ‘Save Changes’. If you do not, your item will not be added to the layout - we have all done it and can verify that it is exceptionally annoying when you have to start over!
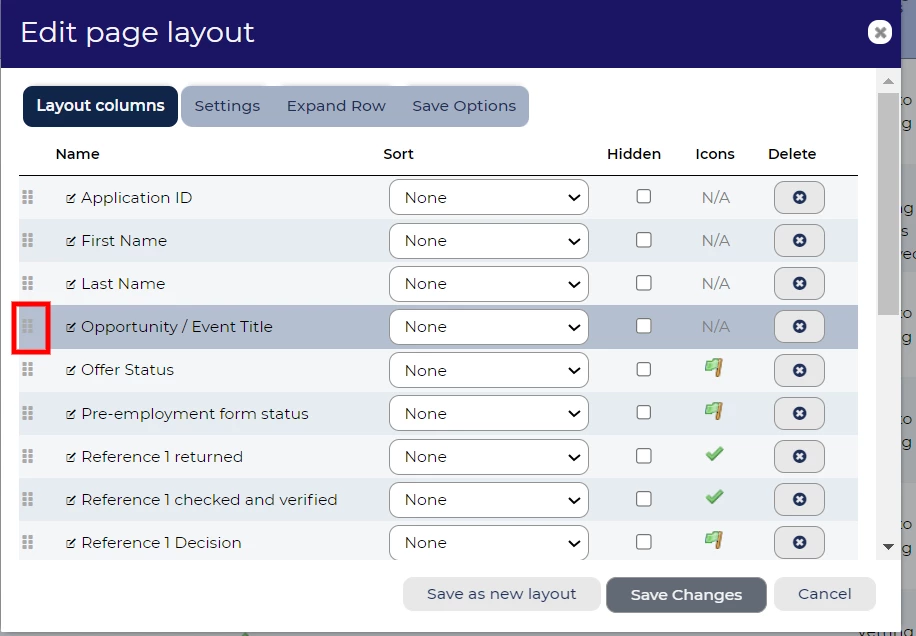
Reorder
💡 Did you know that you can easily change the order of information within your table layout? Simply hover over the six square dots to the left of the item until a hand cursor appears, and drag the items into the order that works for you.
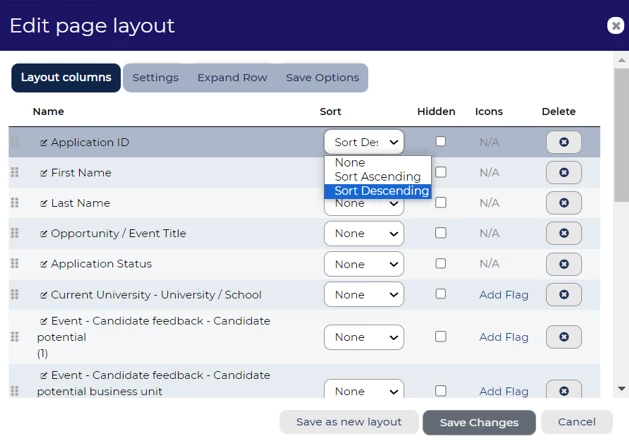
Sort data
💡 Similar to an excel spreadsheet, you can choose which data point to sort your data by - and also pick how this should be sorted. Perhaps you always want the newest application first, in which case you can sort ‘descending’ on Application ID or Submission Date.
Rename columns
💡 Do your table layout headers take up too much screen space? Some titles may not be clear or are too long, in which case you can simply click into the name of the item and amend this. This is particularly useful when you are setting up ad hoc reports and wish to have more concise / useful headers.
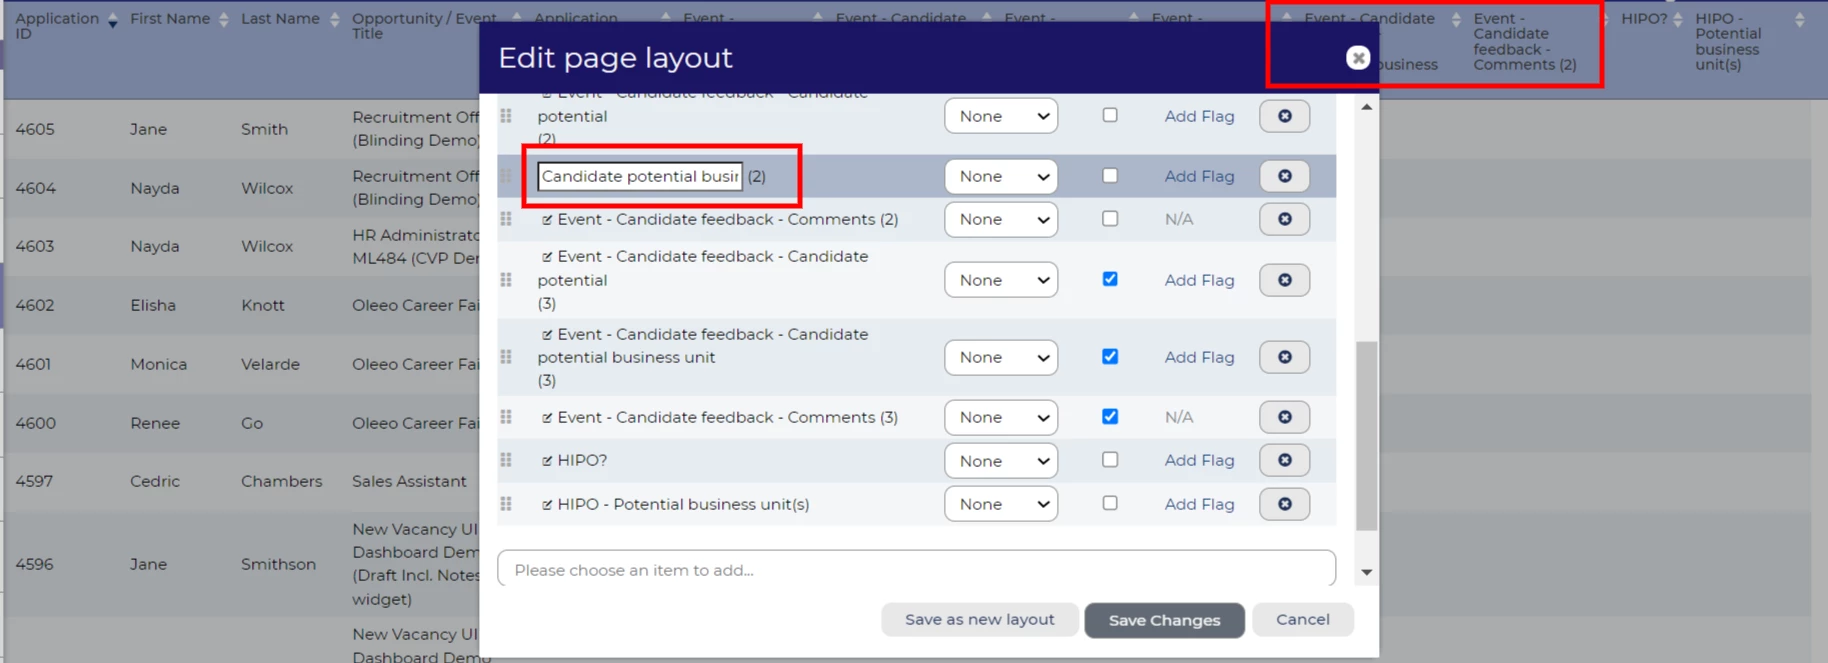
In this example, the column headers have been amended to remove the redundant pre-fix of ‘Event - Candidate Feedback.’
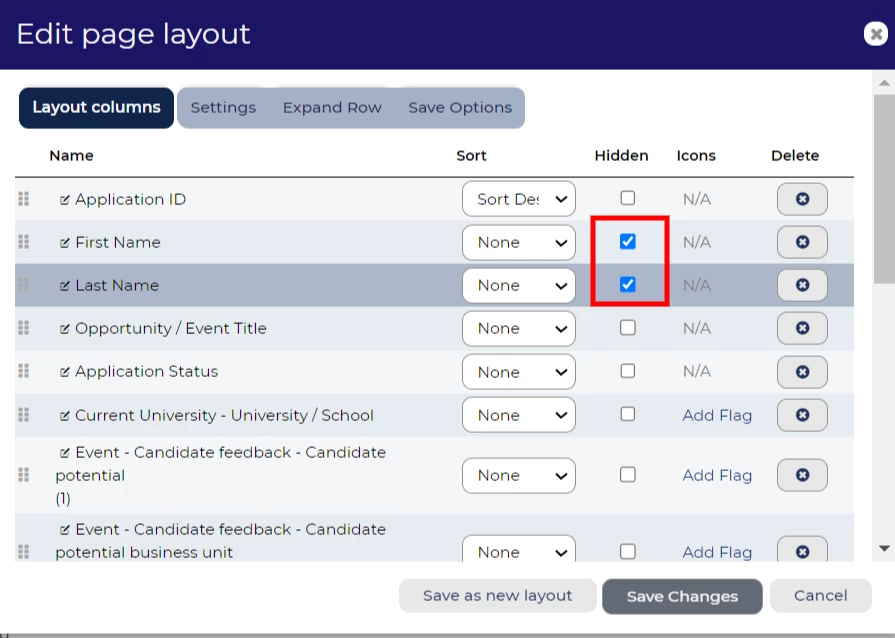
Hide columns
💡 Did you know that you can hide items from your table layout that are not relevant for your current task? When exporting ad hoc reports, it may be useful to hide personally identifiable information and just export the raw data you wish to report on. To do this, edit your layout and select the fields you do not wish to appear.
When you have completed your export, you can then pop back into the settings and easily unhide the personal information.
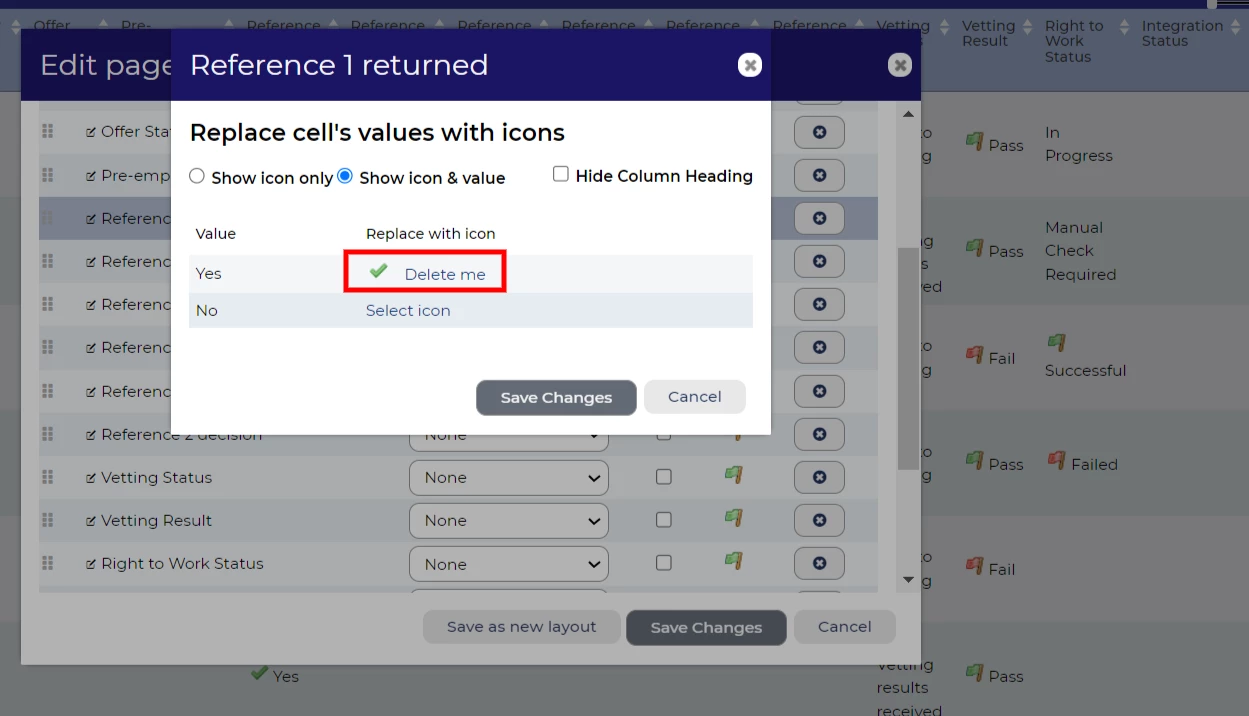
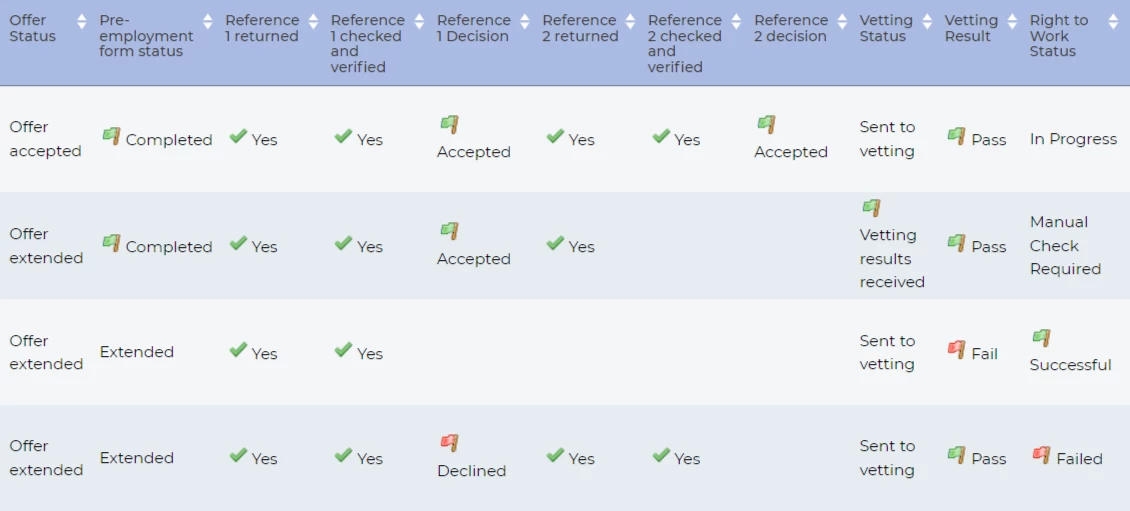
Icons / symbols
💡 It can be difficult for the human eye to discern specific written information when reviewing large quantities of data at once. Consider amending some of your lookup responses to symbols so that you can easily identify these at a glance.
Perhaps, as an example, you wish to flag those who have failed certain vetting criteria. A red flag symbol could work nicely here. Or, perhaps you wish to track where your candidate is within the offer and onboarding process to see which checks have been returned.
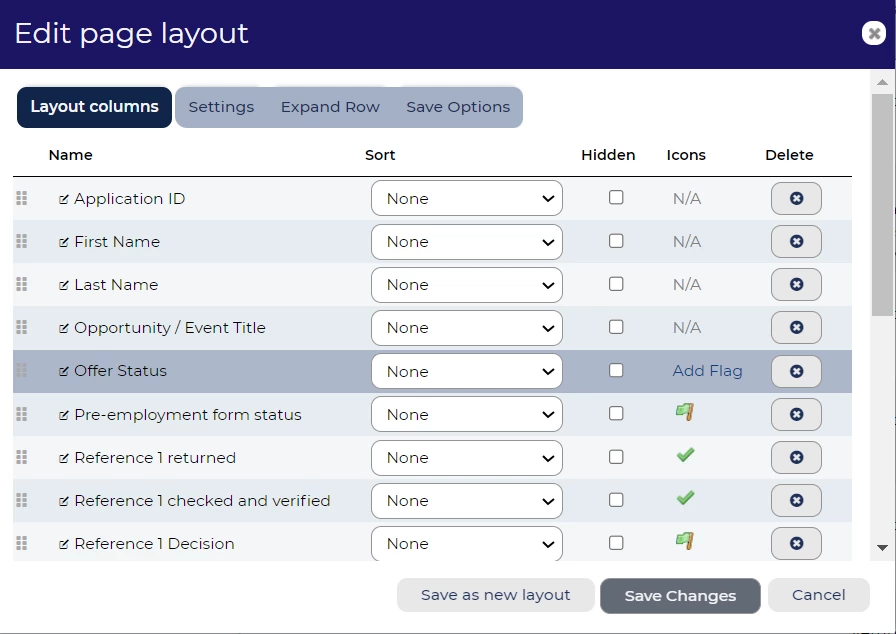
To assign a symbol, simply edit the table layout and select ‘Add Flag.’ This will open a pop out that will allow you to select from 90 different symbols.
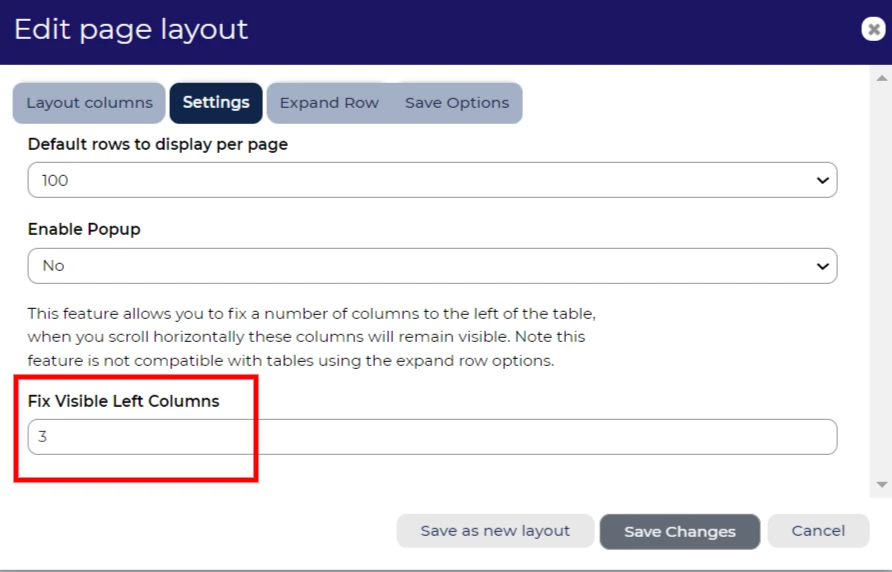
Fix visible columns
💡 Similar to a spreadsheet ‘freeze’ function, you can fix the columns for those particularly wide table layouts. When you scroll left and right, the selected number of columns will always be visible.
To freeze columns, edit your layout and select ‘Settings’ from the tab options. You can then update the ‘Fix Visible Left Columns’ field.
Save your layout
💡 If you plan to use the customised layout regularly, you can save your layout to your list of available layouts. Please be aware that this will only be available to you.
To save your layout, select edit and navigate to the ‘Save Options’ tab. You can then give your layout a name and save the changes.
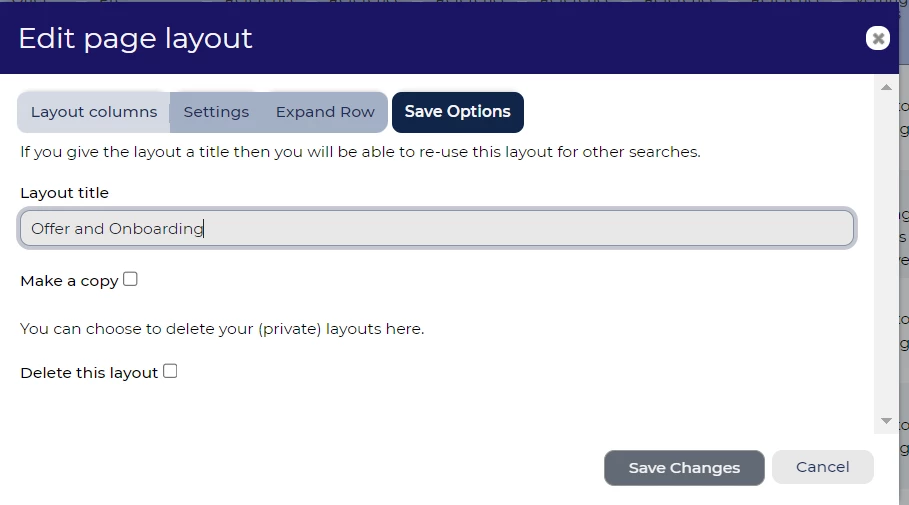
Creating multiple table layouts that contain the same core information? Save time by creating the basic table layout structure and save further iterations separately using the ‘Make a copy’ option within the ‘Save Options’ tab.
Creating ad hoc reports
💡 Table layouts are an excellent way to create quick, ad hoc reports containing raw data. When you have created a layout that provides you with all the information you need, you can easily export all or selected rows, from the layout into excel.
Navigate to ‘Download Layout’ located on the far right of the dark blue ribbon bar and then select the appropriate option.

😊 Does anyone else have any hints and tips when creating table layouts? Or have you created a layout that you find particularly useful? Comment below!
BENEFITS
- All the data that you need in one place.
- Flexible exporting options.
- Create quick, ad hoc reports of raw data.
- Review relevant information to the task you are completing, in easy to read views.
- Support bulk activities.
CONSIDERATIONS
Customising your personal table layout is fine for small tweaks, but consider if these changes need to be applied on a global level. Likewise, would your new customised layout be useful to your wider team? Speak with your Oleeo Supported User, or Customer Success Manager in order to include a layout in your global table layout list options.
Combine your table layouts with your saved searches for more powerful ad hoc reporting.
COSTS
This feature is part of the standard product offering.
NEXT STEPS
Speak to your Customer Success Manager if you would like further information or support.


