

Your campaign’s ‘Emails’ tab is where you can view, amend, and build beautiful and engaging emails. Additionally, you can use the scheduler tool to automatically send out emails according to criteria set by you.

CREATING AN EMAIL
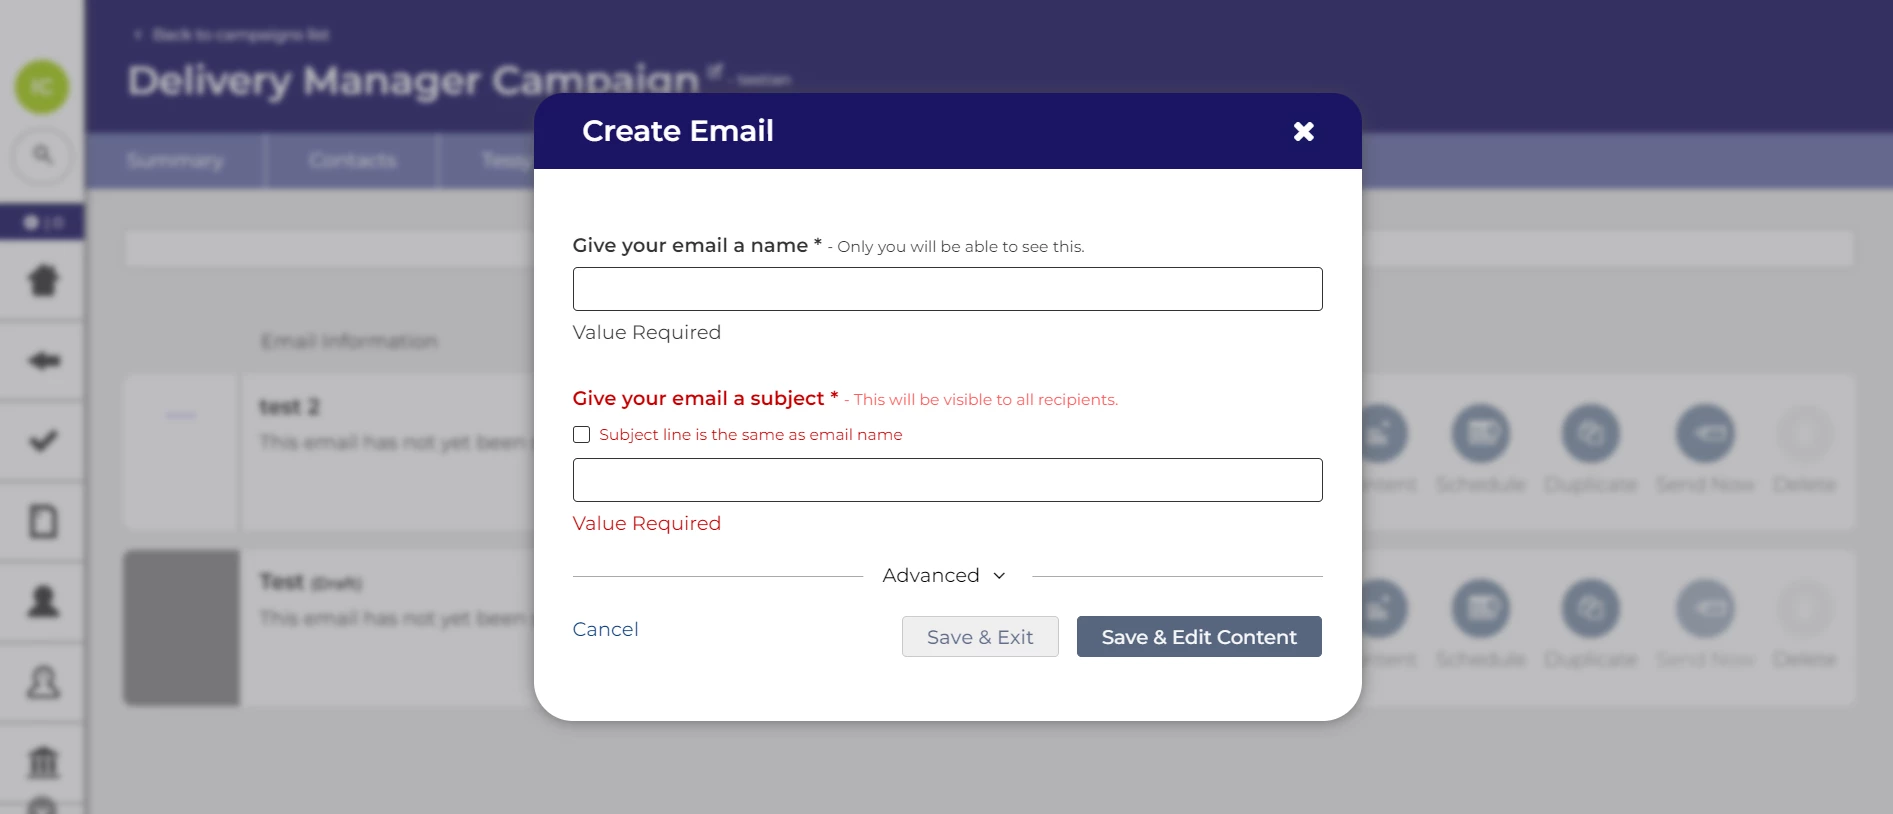
To get started creating a new email:
-
Go to your campaign’s Emails tab.
-
Click on the Create Email button at the top of the page.
-
Enter a Name for the email.
-
Enter a Subject:
-
If the Subject matches the name, tick the ‘Subject line is the same as email name’ box to save you from having to enter it twice.
-
The system will warn you if the ‘Subject’ is too brief or too long.
-
-
Click Save & Edit Content to create.
-
Select a Template to build your email. You can also select Blank if you would like to create your template from scratch.
Changing the name and subject: Once an email has been created, you can change the name and subject from its ‘Summary’ tab
EDITING AN EMAIL’S CONTENT
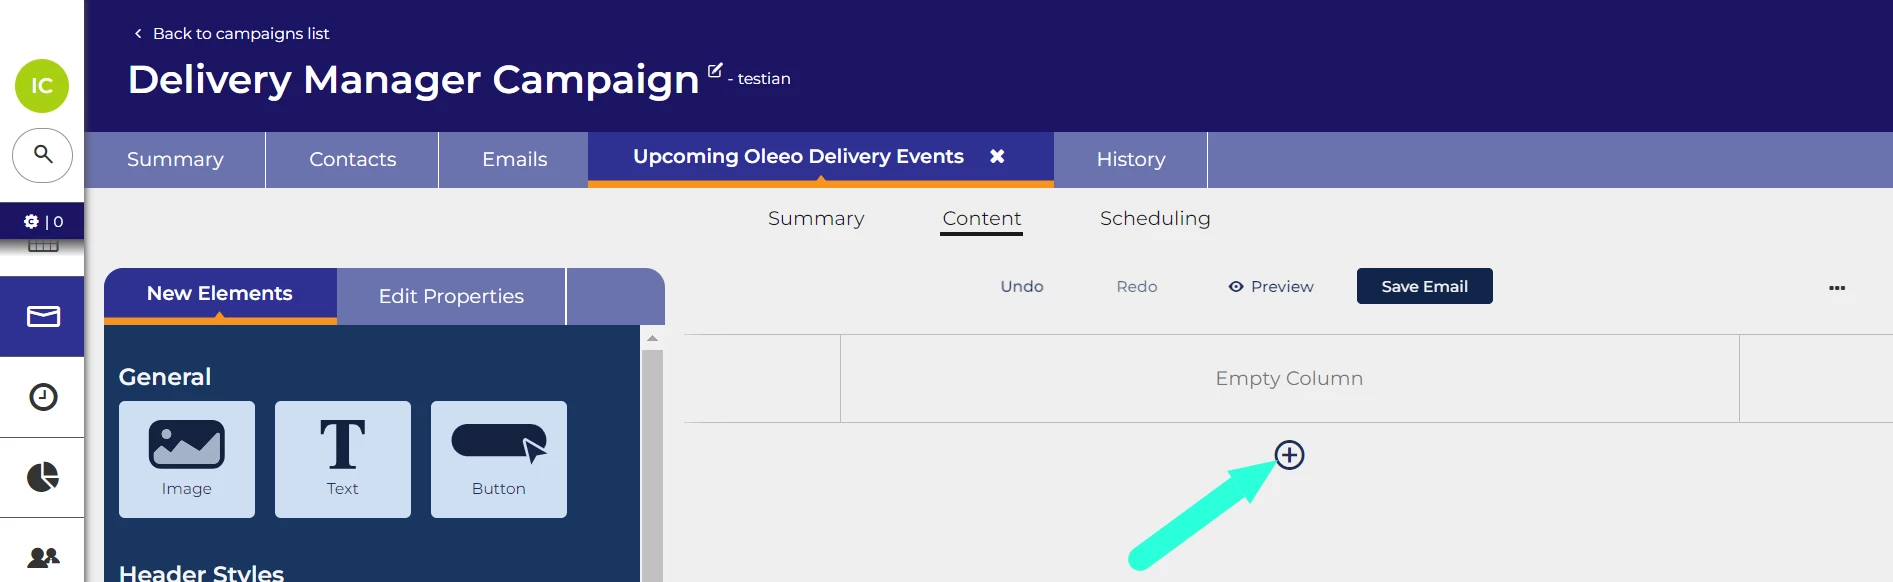
When entering the details of an email, if you clicked ‘Save & Edit Content’, you will be taken straight to its ‘Content’ page where you can start adding sections and elements.
Alternatively, you can return to this page by navigating to your campaign's ‘Emails’ tab, locating the email you want to edit from the list, and clicking its ‘Content’ icon.
Above your email content, there are several helpful links and options:
-
Undo and Redo - Enable you to revert any changes if you make an error and put the change back in place if you change your mind.
-
Preview - Shows you what the email will look like when the recipient views it.
-
Save Email - Must be clicked before moving away from your ‘Content' page.
Clicking the ‘...’ links on the right side will give you access to template options. There, you will be able to upload an email as a template and download a template to your local machine.

Adding sections to the content
Emails are split up into sections. To add a new section to your email, click the + icon, which will add a single column section to your email.
Sections with multiple columns: By default, sections contain a single column. You can change a section to have 2 or 3 columns by applying a body style to the section as described later in this guide.
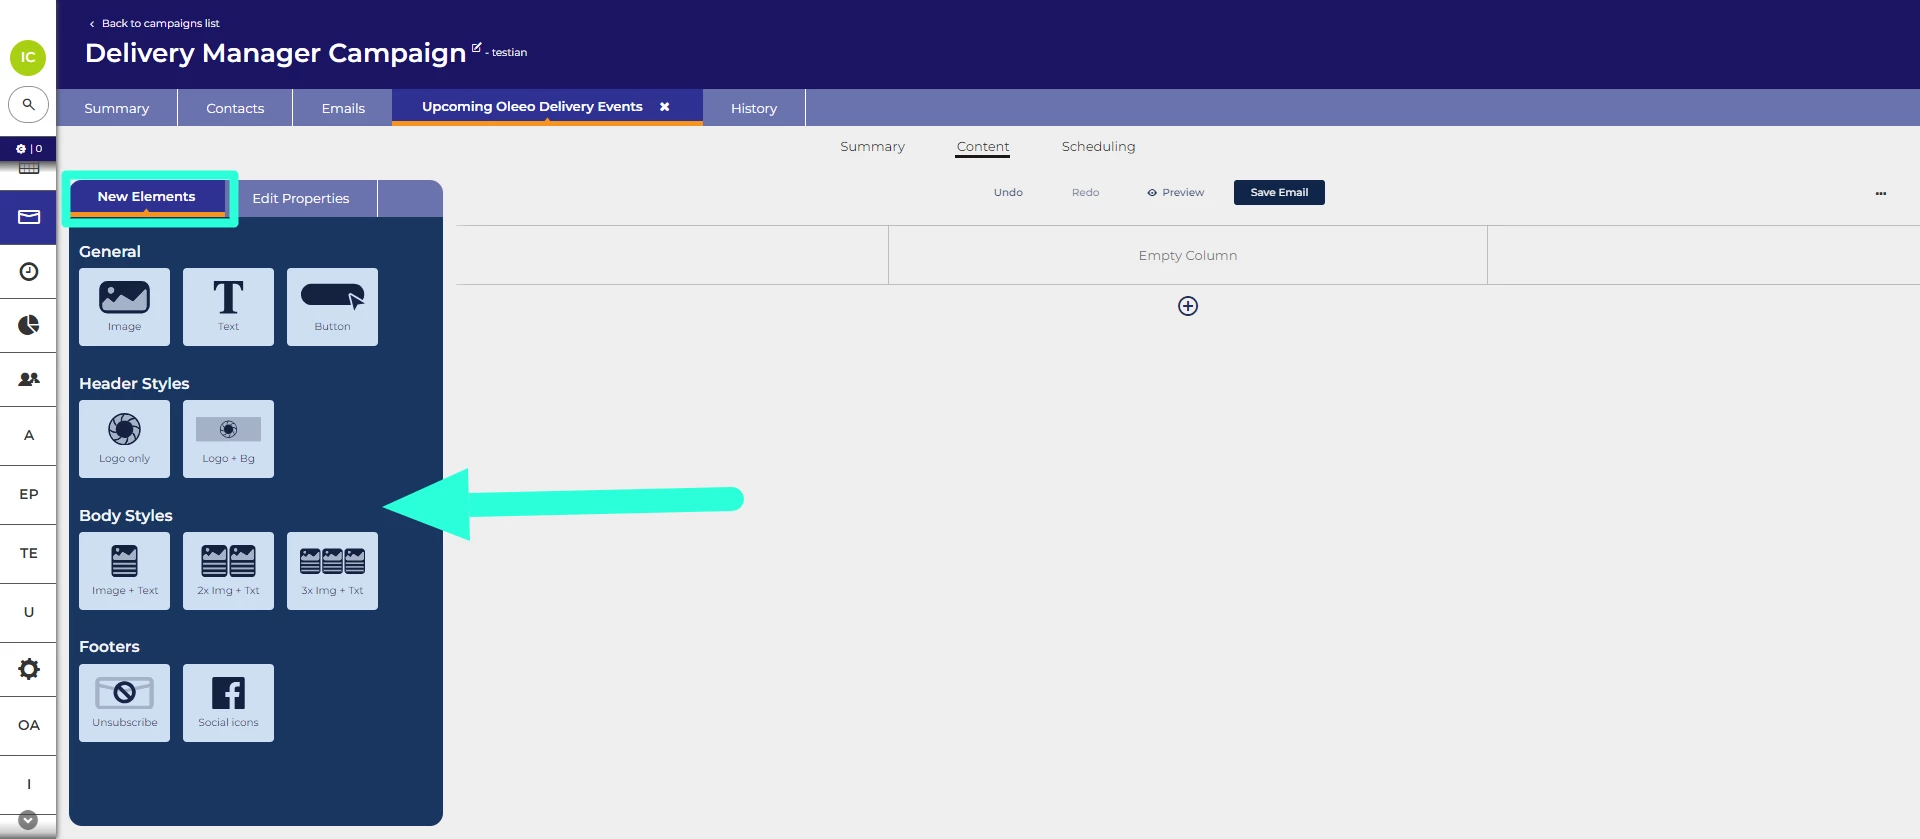
Overview of types of elements
You can add the following types of elements to sections within your email:
-
General - Images, Text, Buttons
-
Header Styles - Logo only, Logo and Bg (background)
-
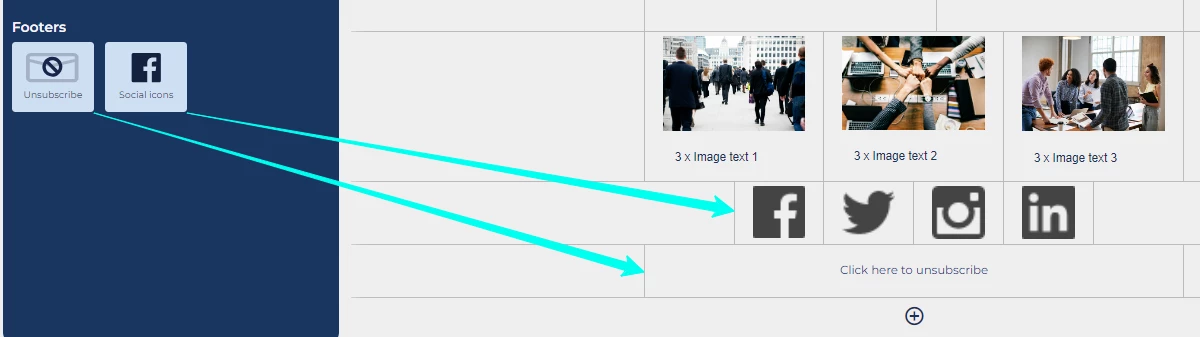
Body Styles - Image and text, 2x image and text, 3x image and text.
-
Footers - Unsubscribe, Social Icons.
Adding elements to sections
General steps to add an element:
-
On the ‘Content’ page of your email, locate the 'New Elements' tab on the left-hand side.
-
To add a new element:
-
Option 1: Click on the section in your email where you want to add the element, then select the desired element from the 'New Elements' tab.
-
Option 2: Drag the element from the 'New Elements' tab and drop it into the section where you want it to be placed in your email.
-
-
After adding an element, click on it within the ‘Content’. The ‘Edit Properties’ tab will now be shown in the elements section on the left.
-
Complete the fields in the ‘Edit Properties’ form.
You can add multiple elements to the same section.
Adding Image elements
When adding an Image element, the ‘Edit Properties’ tab contains the following fields:
-
Link for image (optional) - Enter a URL in this field if you want candidates to be directed to a webpage when they click in the image.
-
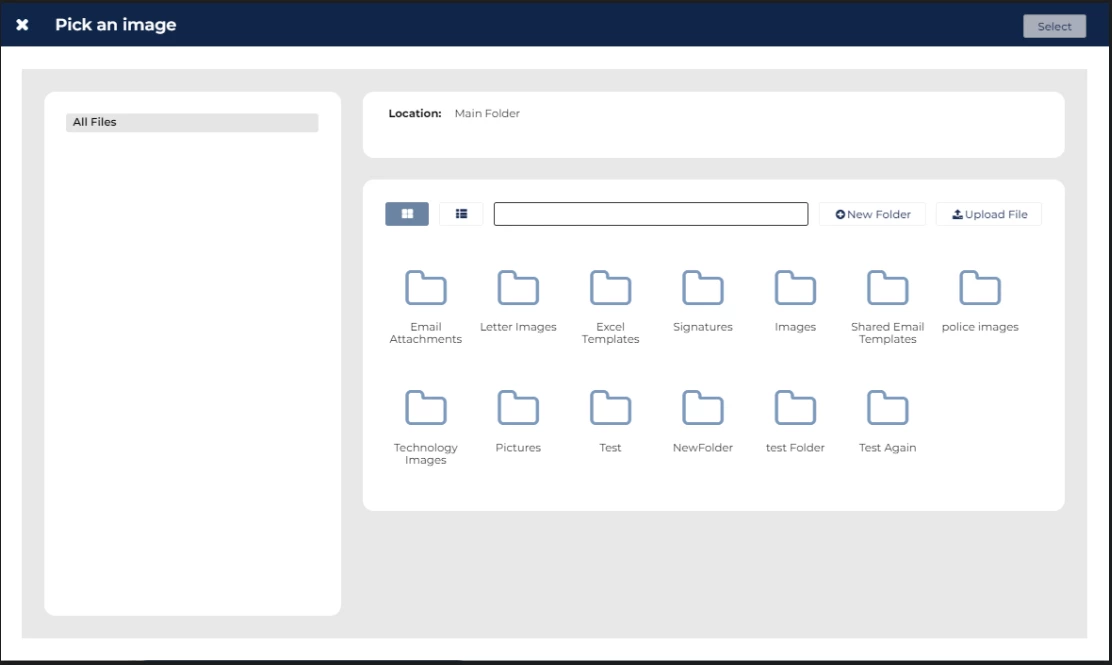
Pick an image - Use to select an image from your file library or upload an image.

Once you have clicked ‘Pick an image’ you will be able to:
-
Select an image from your file library - Navigate to the desired folder and choose an image.
-
Upload a new image - Select a folder to store the image and then click 'Upload File' to upload an image from your computer.
Images resize: Images will always resize to fit the width of the section they are in.
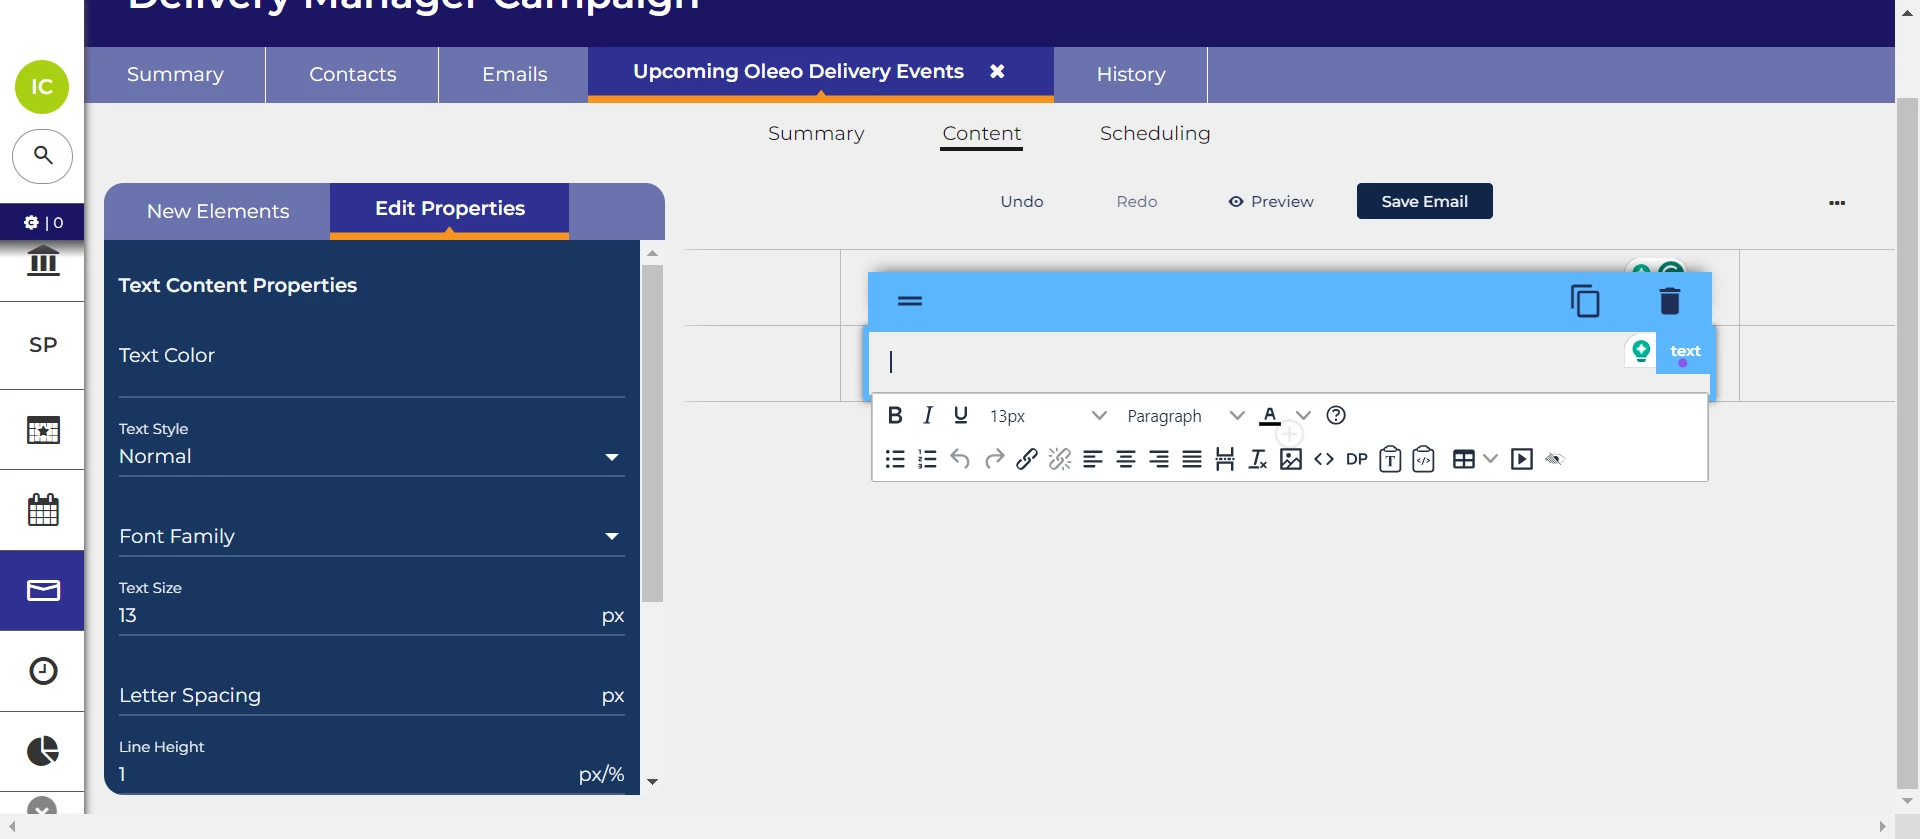
Adding Text elements
When adding a Text element, the ‘Edit Properties’ tab allows you to change the text color, text style, font family, text size, letter spacing, line height, text weight (i.e. ‘Normal’ or ‘bold’) , text transformation (i.e. ‘None’, ‘Capitalise’, ‘Uppercase’ or ‘Lowercase’) and text align.
In addition to this, once you have clicked into the text element in the content, you will be able to use the rich text editor to format the text and add datapaths.
Merging the candidates’ first names into a text element
You can personalise emails by merging the candidates first name into a text element.
To do this:
-
With in a text element, place your cursor at the point where you want the candidate’s name to appear.
-
Click ‘DP’ (Datapath) in the element’s rich text editor.
-
From the ‘Person dropdown, select ‘First Name’.
-
Click ‘OK’.
Adding Button elements
You can enhance your emails by incorporating buttons that redirect candidates to specific destinations, such as job or event advertisements.
The ‘Edit Properties’ tab for buttons includes the following fields:
-
Button text - Specify the text displayed on the button for candidates to read.
-
Button link - Determine the destination URL where candidates will be redirected upon clicking the button.
-
Background Colour - Customise the background colour of the button.
-
Text Colour - Customize the colour of the button text.
Adding Header Styles elements
The Header Styles options provide predefined templates for structuring sections in your email:
-
Logo only - Adds a section with a centred image placeholder.
-
Logo + Bg - Adds a section with a centred image placeholder and a background color.
These templates are designed to assist you in organizing your email layout. Even if you select 'Logo only', you can still add a background colour later by clicking on the section and adjusting the details in the Edit Properties tab.

Adding Body Styles elements
By default, sections contain a single column. You can change a section to have 2 or 3 columns by applying the Body Style element to the section.
If you apply a Body Style, each column in the section will contain an image element and a text element. However, if you only require one of these elements in the column, click on the element you want to remove and click the ‘Delete Element’ button

Adding unsubscribe link
Adding the unsubscribe link will insert hyperlinked text that, when clicked by the recipient, unsubscribes them from all CRM campaigns on your system.
Best practice: It's considered best practice to include an unsubscribe link in all emails to provide recipients with the option to opt out of future communications.
Adding social media icons
Adding Social Icons will add a 4 column section that contains icons for Facebook, X (formerly known as Twitter), Instagram and LinkedIn.
Once the icons have been added to the content, click on an image to open its Edit Properties tab. From there, you can:
-
Add the URL for your company's corresponding social media page.
-
Remove or replace an image.
SAVING AN EMAIL TO YOUR LIBRARY OF TEMPLATES
You can save a CRM campaign email to your library of templates for use when creating new emails.
- Open the campaign that contains the email.
- Navigate to the Emails tab.
- Click the Content button for the email you want to save.
- Click on the vertical ellipsis icon (⋮) on the right side of the page and select Save to Library from the dropdown menu.
- In the pop-up, enter a name for the template.
- Click Save.

