

You can use the Scheduling tool to efficiently schedule CRM Campaign emails to be sent out at the perfect time for your recipients based on primary and secondary triggers.
ACCESSING THE SCHEDULING TOOL
To get started, navigate to your campaign’s Emails tab, then locate the email you want to schedule from the list and click the Schedule button.
Alternatively, if you are already editing an email, you can access the scheduling tool by navigating to the ‘Scheduling’ tab located in the email’s tab.
ADDING TRIGGERS TO SCHEDULE
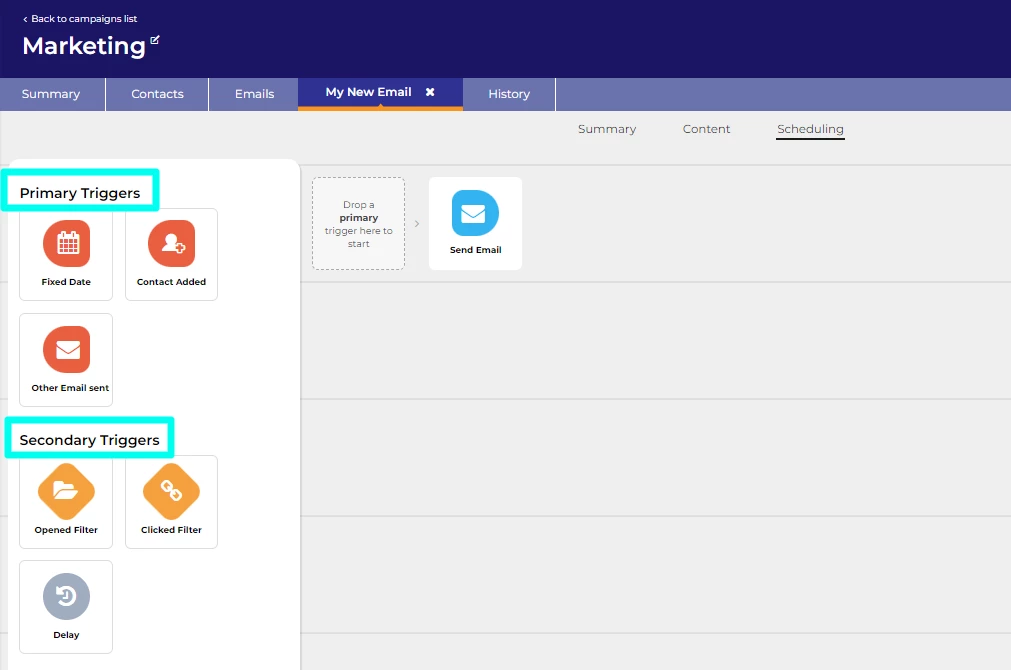
Once you've navigated to the Scheduling page, you will see your Trigger Menu on the left, with space to the right to add your schedule rules.
The menu contains two sections: Primary Triggers and Secondary Triggers. To use a trigger, simply drag and drop your selected trigger onto the Drop a primary trigger here to start icon.
Once the primary trigger is in place, an optional secondary trigger icon appears, along with a second row allowing you to set another primary trigger to send the email.
TRIGGER TYPES EXPLAINED
Primary Triggers
Primary Triggers are actions that happen independently of the email you're scheduling and mark the start of a schedule leading to your email being sent out. These include:
- Fixed Date - This trigger allows you to select a specific date and time in the future. When that date and time is reached, the email schedule will trigger for the current email to be sent to everyone listed in Contacts for this campaign.
- Contact Added - This trigger activates the email schedule every time a new contact is added. This ensures that any new contact you add will receive the email immediately.
- Other Email sent - This trigger enables you to select another email in your campaign. When that email is sent, the email schedule will trigger for the current email to be sent to whoever received the other email.
Secondary Triggers
Secondary Triggers are actions that happen to the email you're scheduling. They allow you to customise your schedule further by adding additional criteria that need to be met (triggered) in order for the email to be sent out:
- Opened Filter - This trigger allows you to add additional criteria to your schedule so that the schedule only runs if another email was opened (or not opened).
- Clicked Filter - This trigger allows you to add additional criteria to your schedule so that the schedule only runs if a button in another email was clicked (or not clicked).
- Delay - This trigger allows you to add a delay to when a secondary trigger is checked. For example, maybe you want to wait for a week to see if the contact clicks the button in another email and only send the next email (a chaser) if the button is never clicked.
