Pages allow you to create custom content that is accessible to candidates via a unique URL within the Application Centre. Pages give the flexibility to provide candidates with additional insight into your company, showcase why you are a great place to work or even offer helpful tips to assist them through the process of applying for the opportunities you have available.
Once you have created a page you can link it to an advert and publish it to the Application Centre.
CREATING A NEW PAGE
- In the left-hand menu, navigate to Talent Engagement > Pages.
- In the Page List toolbar, click the Add button.
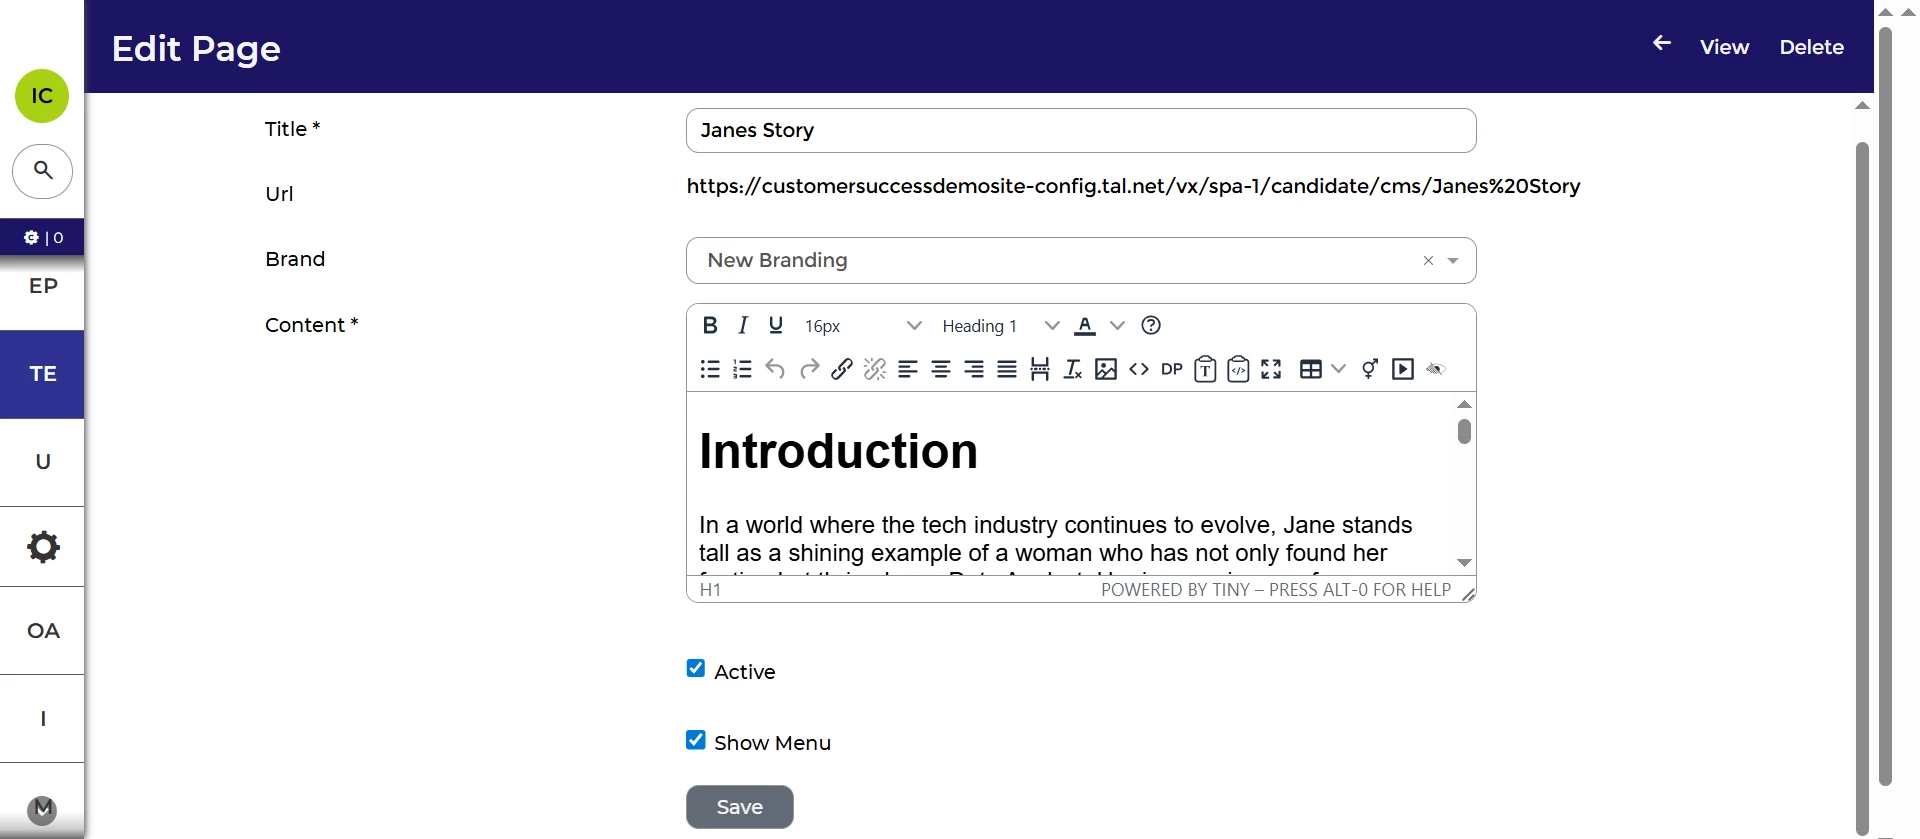
- The Create Page form will open.
- Complete the fields:
- Title: The title of your page, visible in the Pages List. It is useful to give your page a concise and descriptive name to avoid confusion when viewing the Page List after your page is created.
- URL: The unique webpage URL for your page will display in this field. The URL will include the page's title. Using this URL provides direct access to your page. Alternatively, the URL can be added into the 'Link to (URL)' field in the Advert builder to allow an active advert to link directly to your page from the Application Centre. This field cannot directly be edited.
- Brand: Configure your page to appear with specific branding as configured within the Oleeo system. Select a branding option to display that branding above and below your page’s information. Leaving this field blank will prevent all preconfigured branding from appearing on your page. If you are unsure please select the "Default" option listed.
- Content: This is how your page will appear to candidates that visit it. Build your page in this section with the built-in text editor; utilise rich text formats, add images and web links, or use any of the tools available in the toolbar at the top of the editor to create the page exactly as you like it.
- Translate:
- If your application centre supports multiple languages, this button will appear.
- You should use this button to enter translations for all available languages.
- Active: This check box allows you to specify if the page is active or not within the Application Centre. Only active pages will be accessible to candidates. Pages with the 'Active' option unchecked will remain in the system but will show a ‘Page Not Found’ error for anyone attempting to view the URL.
- Show Menu: This check box allows you to select whether the Application Centre Menu Bar appears above your page content, allowing further navigation within the Application Centre. If unchecked, the menu will not appear, and the user will need to manually return to the Application Centre via their browser to resume navigation after viewing the page.
- Once all necessary information has been completed, click the Create button at the bottom of the Create Page builder.

VIEWING AN EXISTING PAGE
- In the left-hand menu, navigate to Talent Engagement > Pages.
- Select the item from the list and click View in the Page List toolbar, or double-click on the item in the list.
EDITING AN EXISTING PAGE
- In the left-hand menu, navigate to Talent Engagement > Pages.
- Select the item from the list, and click Edit in the Page List toolbar. Alternatively, you may also edit when 'viewing' a page by selecting Edit in the Page toolbar.
Editing page name changes page URL:
- Altering a page's name automatically updates its URL.
- Attempting to access the old URL will result in a 'Page not found' error for candidates.
- The link will not automatically update in the adverts.
- You will need to ensure all adverts linking to this page have their 'Link to (URL)' updated accordingly.


