

In this guide, we’ll explore the benefits of Oleeo’s new vacancy management interface, and share some tips for getting the most from the new look. For more a more detailed walkthrough, take a look at our user guides:
For simplicity, in this guide the term vacancy is used to refer to what might be called an opportunity or requisition in your system. Your new interface will use whatever term your system uses.
The new vacancy interface has been designed to enhanced system performance, and to make the experience of navigating Oleeo smoother and easier. We’ve grouped the changes and benefits into three areas:
- The vacancy dashboard
- Improved vacancy creation
- Simplified access and navigation
Below we breakdown each area, exploring what’s new and how it will benefit your day to day work.
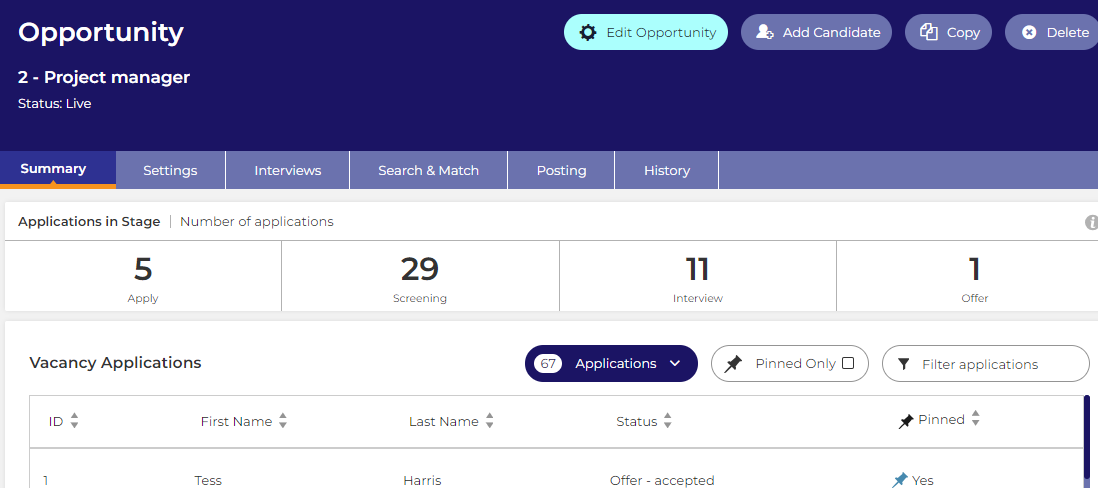
The vacancy dashboard
When you land on vacancy, the first thing you’ll see is the vacancy dashboard. The dashboard makes it easier and quicker to access relevant information, via:
- Application list
- Application in Stage widget.
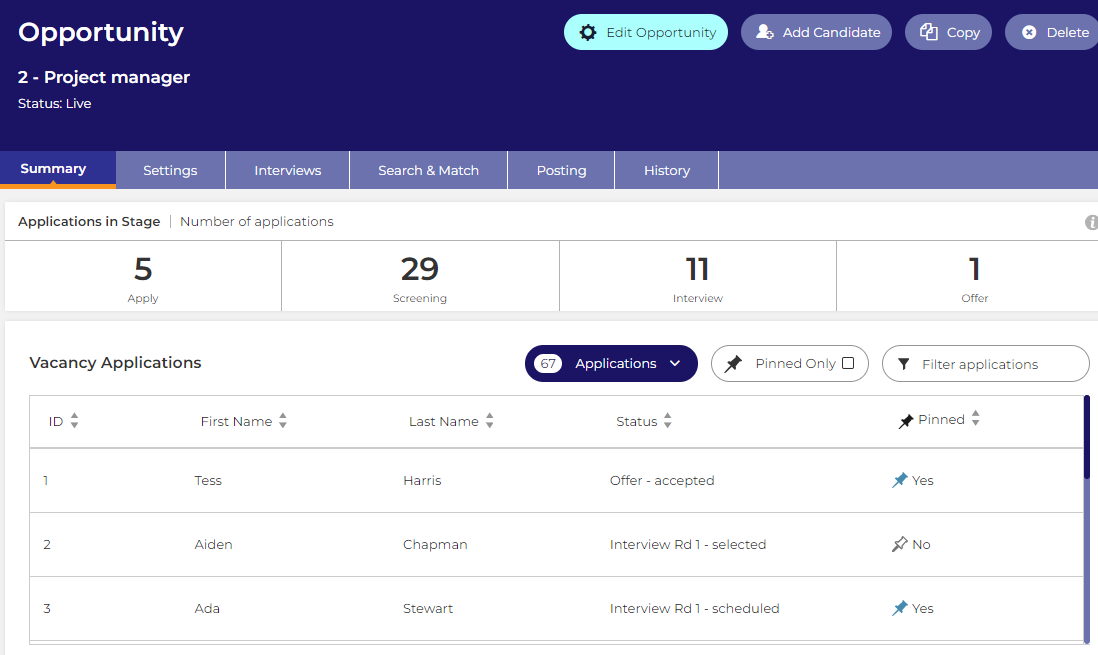
Application list
The Application list lets you easily access applications, without having to navigate to a separate part of the system.
Quick tips
- The Application list is a great way to quickly access and review candidate information, and allows you to click through to the full application page, where you can perform advanced actions
- Use the drop down filter to filter according to stage, and use the search box to search according to the column headings
- The Pin button is a brand new feature - use it to bookmark applications that are note worthy. You can then use the Pinned Only checkbox to filter your list on any applications that you’ve pinned.
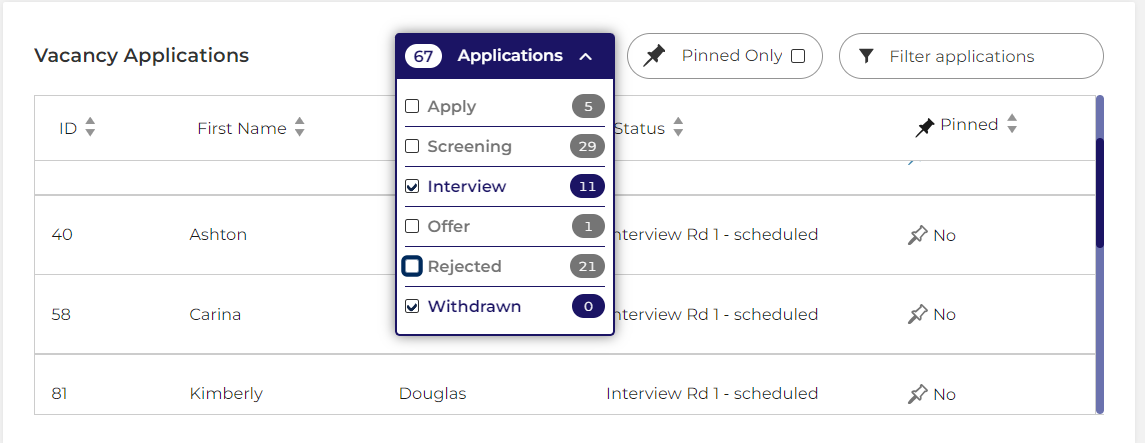
Applications in stage widget
The aim of this widget is to give you useful information about the vacancy. It shows the number of active applications at each stage of the vacancy process. Stage refers to group of statuses that represent a stage. For example - a stage called “1st Interview” might include the statuses “Invited to 1st Rd Interview”, “Scheduled for 1st Rd Interview”.

Quick tips
- You can access the list of the applications in each stage by clicking on the number.
Improved vacancy creation
We’ve enhanced the vacancy creation process by moving it from a page, to a pop out screen. The pop out screen means there is less data to load, and will allow users to immediately start building their vacancy.
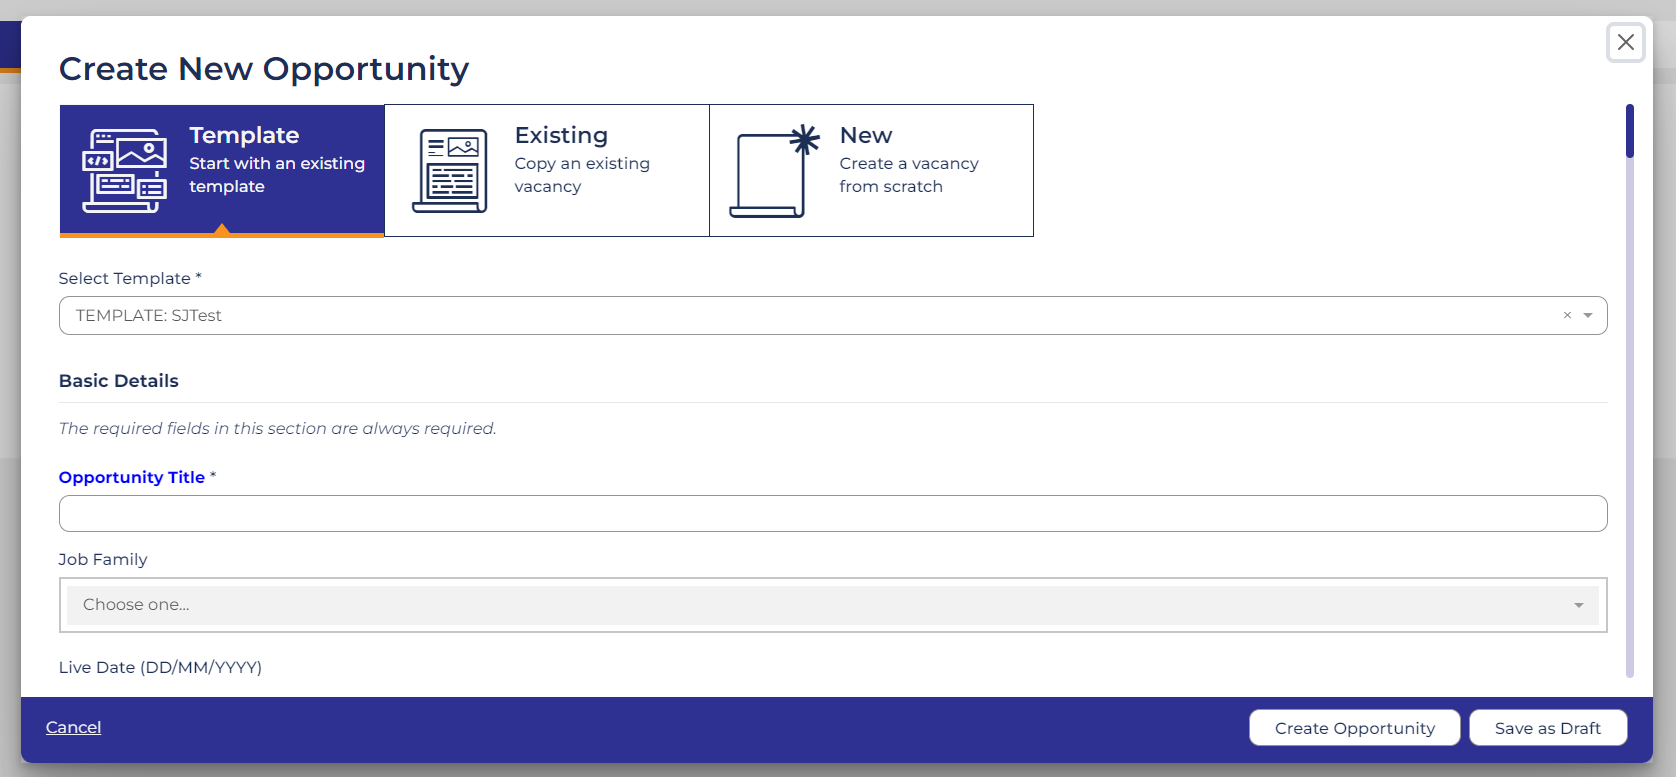
Quick tip
- The option to copy a vacancy has been moved to the creation stage. Selecting Existing allows you to copy an existing vacancy, and use that as the basis for your new one.
Simplified access and navigation
A common theme that emerged from our user research was that the vacancy summary page was overwhelming, and contained too much information. To reduce visual clutter and cognitive load, we’ve introduced:
- Tab visibility control
- Single point of access through the Edit button
Tab visibility control
The new vacancy interfaces gives each user greater control over which sections of a vacancy are displayed to them. The new vacancy dashboard will display the following tabs by default:
- Summary
- Interviews
- Posting (also known as Portals)
- History
- External Posting (if enabled on your system)
- Agency Posting (if enabled on your system)
The aim here is to prioritise the most frequently used and relevant tabs. Everything else can be accessed via the Edit button, and individual users can choose to show or hide tabs.
Note: Overall tab access and availability will still be governed by your system’s access settings.

Quick tips
- Use tab visibility to hide tabs that aren’t relevant to your role, or to the stage the vacancy is at.
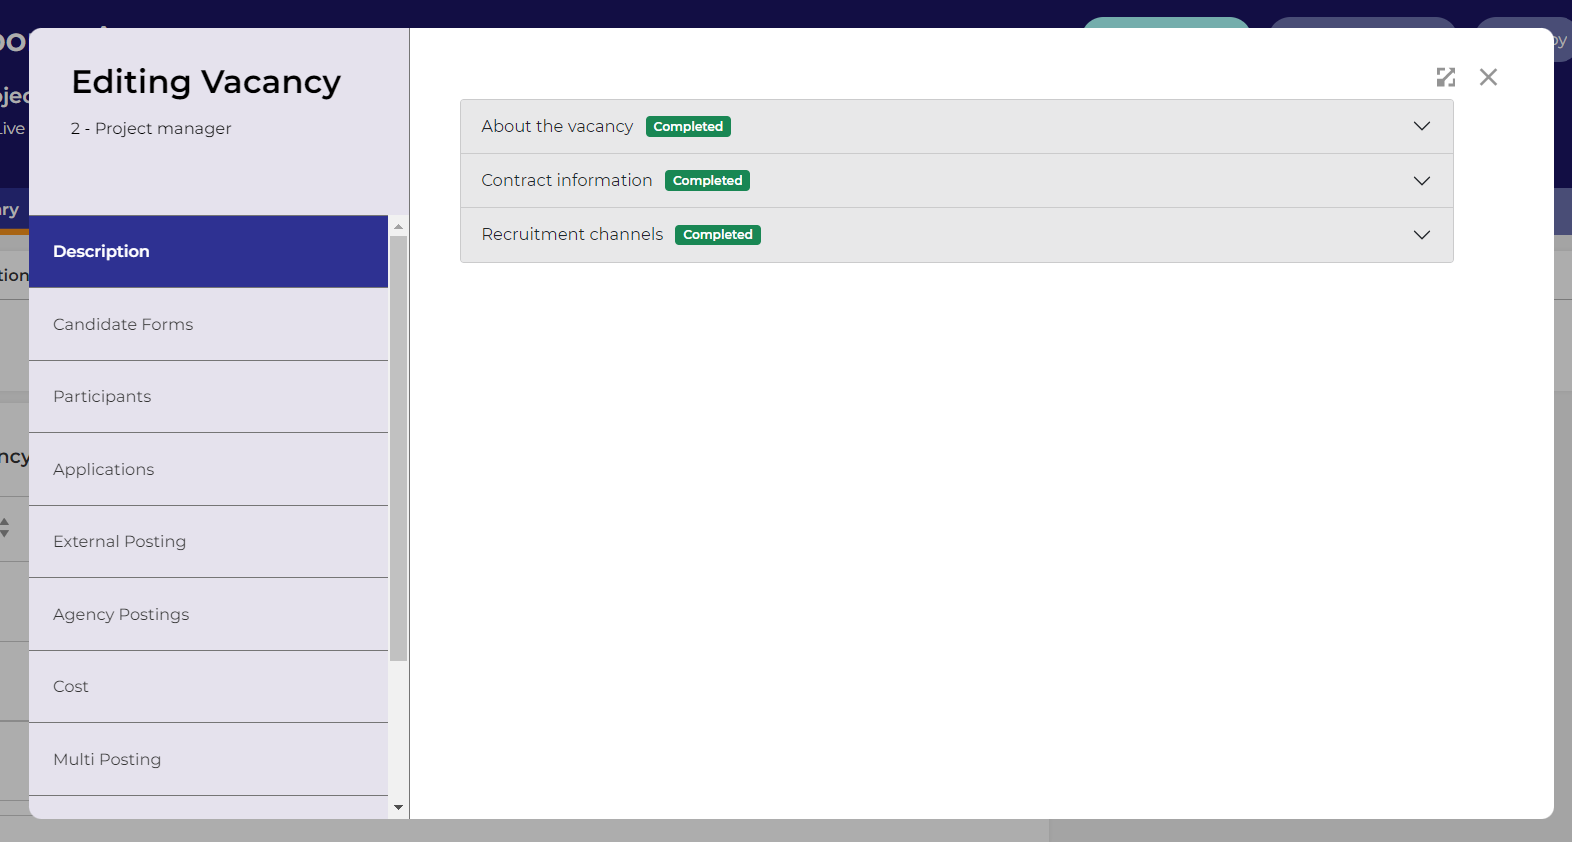
Single point of access through the Edit button
This button in the top right corner of the screen allows you to access and - where access allows - edit all parts of a vacancy from a single point.

After clicking Edit, you’ll be shown a pop out screen displaying any sections that aren’t shown as a vacancy tab. From here, you can edit or view information, according to your permissions.
Quick tips
- The section previously called Details has been renamed to Settings.
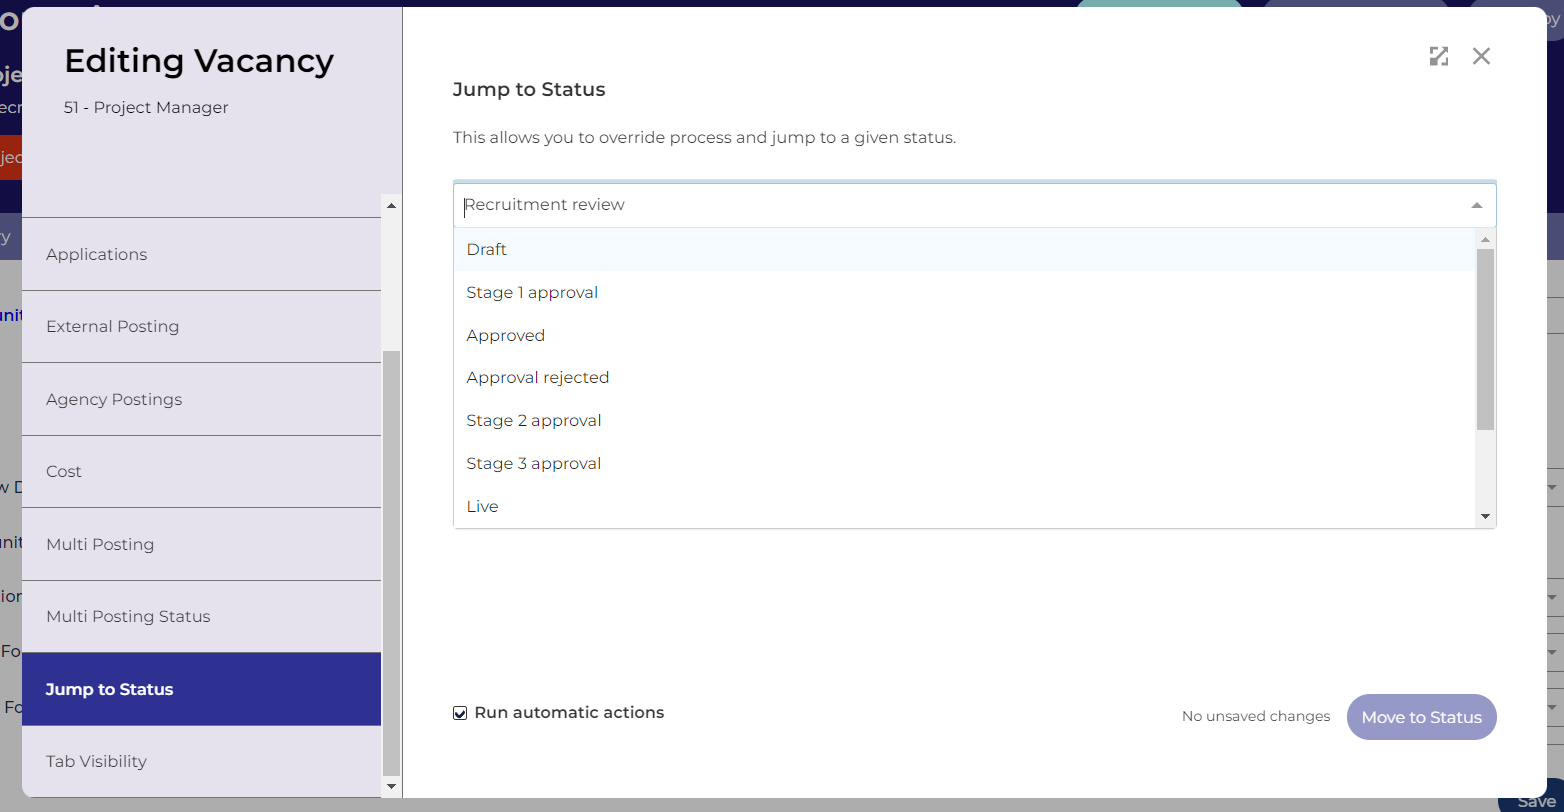
- What was previously called Other Status has been renamed Jump to Status, and can be accessed through the Edit screen.
User guides


