

With Oleeo's mobile app, recruiters can ensure they are engaging with attendees while also being able to record their feedback on the attendees quickly and easily in a simple to use app.
In addition to this, the mobile app allows you to turn your tablet into a kiosk with Self Check-in mode. While in this mode, attendees can register and/or confirm their attendance when they show up without you having to manually keep track of attendance.
DOWNLOADING THE MOBILE APP
For iOS Users
-
Open the App Store:
- Tap on the App Store icon on your home screen to open it.
-
Search for the Oleeo Mobile Recruiting app:
- In the search bar at the top, type in "Oleeo Mobile Recruiting" and tap the search button.
-
Download the app:
- Find the Oleeo Mobile Recruiting app in the search results.
- Tap the "Get" button next to the app to start the download. You may need to enter your Apple ID password or use Face ID/Touch ID to confirm.
-
Install the app:
- Once the app has been downloaded, it will automatically install on your device.
- After installation, you can open the app by tapping the Oleeo Mobile Recruiting icon on your home screen.
For Android Users
-
Open the Google Play Store:
- Tap on the Google Play Store icon on your home screen or app drawer to open it.
-
Search for the Oleeo Mobile Recruiting app:
- In the search bar at the top, type in "Oleeo Mobile Recruiting" and tap the search button.
-
Download the app:
- Find the Oleeo Mobile Recruiting app in the search results.
- Tap the "Install" button next to the app to start the download.
-
Install the app:
- The app will automatically download and install on your device.
- After installation, you can open the app by tapping the Oleeo Mobile Recruiting icon on your home screen or app drawer.
Accessing your system code and logging in
When you open the app for the first time, you will be asked to enter your system’s code.
- Access this code:
- Login to the ATS from your computer.
- Open your account settings by clicking on your name at the top of the left-hand menu.
- Go to the ‘Mobile’ tab.
- The 5-digit code will be displayed in the tab along with a QR code that.
- Open the app and enter the code:
- Open the app on your mobile device.
- Manually enter the 5-digit code or tap the QR Code icon at the bottom of the page to open you device’s camera and scan the QR Code.
- Tap ‘CONNECT TO SYSTEM’.
- Enter your ATS login details:
- Enter the username and password that you use to access the ATS.
- You will then be taken to the mobile app’s dashboard for your live environment.
Accessing the web version of the mobile app
There might be occasions where you'd prefer to access the web version of the mobile app. For example, if you're unable to download the app on your device or want to familiarise yourself with the app's interface on your computer before using it on your mobile device.
To access the web version:
- Log in to the ATS (Applicant Tracking System) as usual.
- In the address bar (URL), locate the part of the address that comes after "/lang-en-GB/".
- Replace everything after "/lang-en-GB/" with the word "mobile".
- Press the Enter key on your keyboard to reload the page.
SUMMARY OF MOBILE APP FEATURES
Oleeo's mobile app streamlines recruitment events with on-the-go tools.
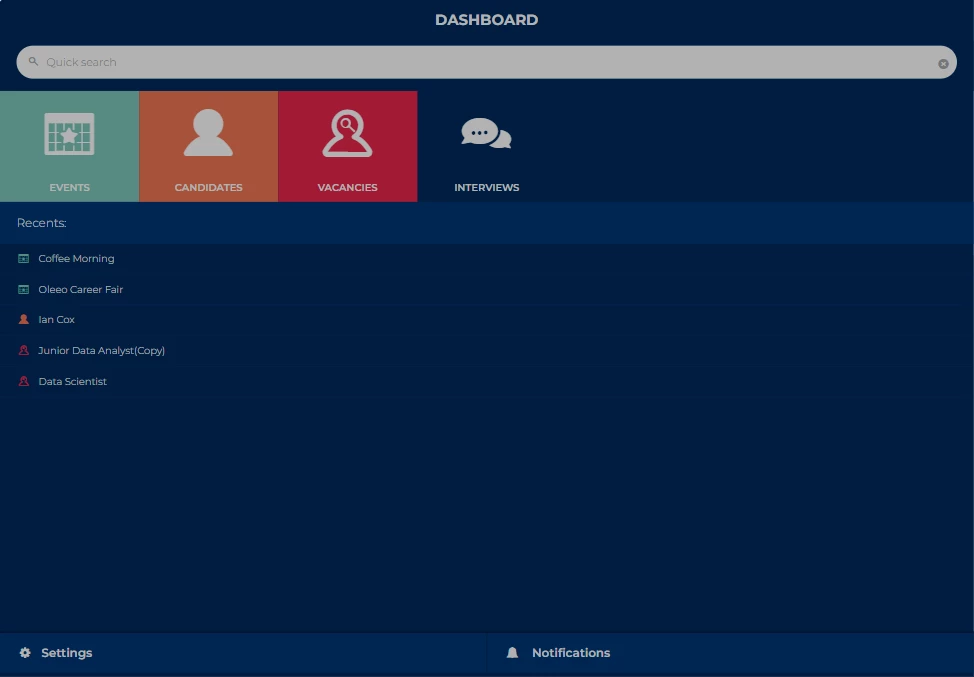
Dashboard:
Provides quick access to your events, candidates, vacancies, and interviews.
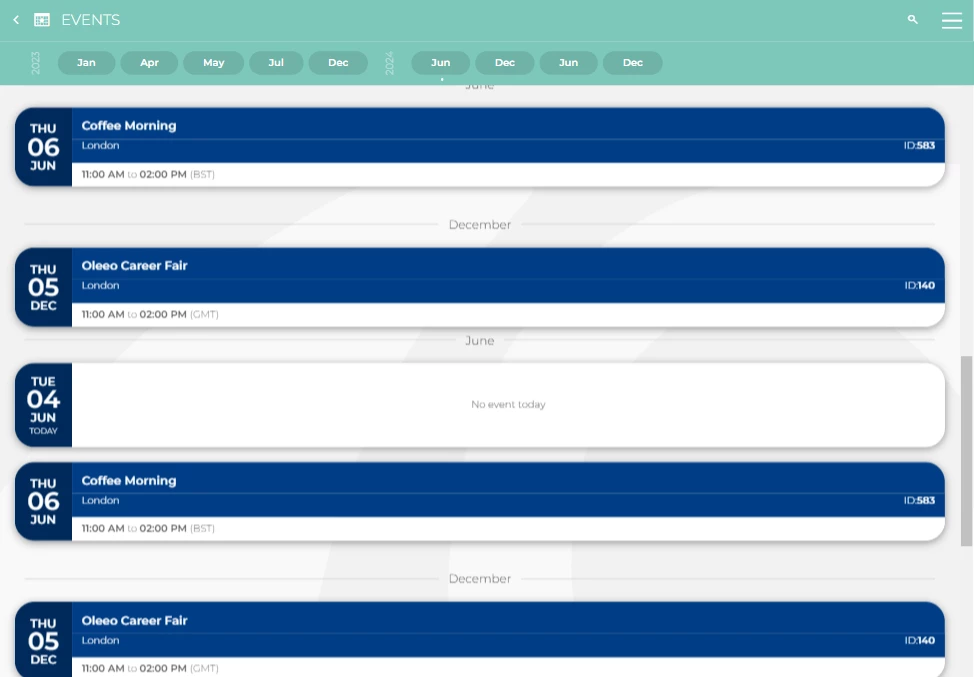
Events Calendar:
From the dashboard, tap ‘Events’ to view a chronological list of events.
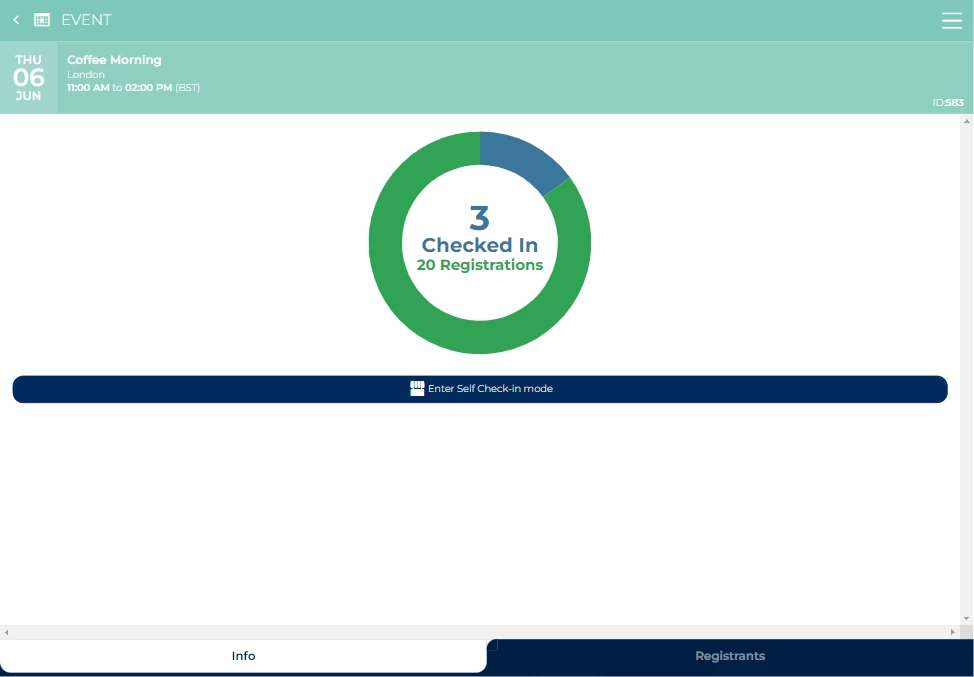
Event Details:
Tapping an event from the list reveals two tabs:
- Info tab: Displays a chart summarising the total number of registrants and the proportion who have checked in.
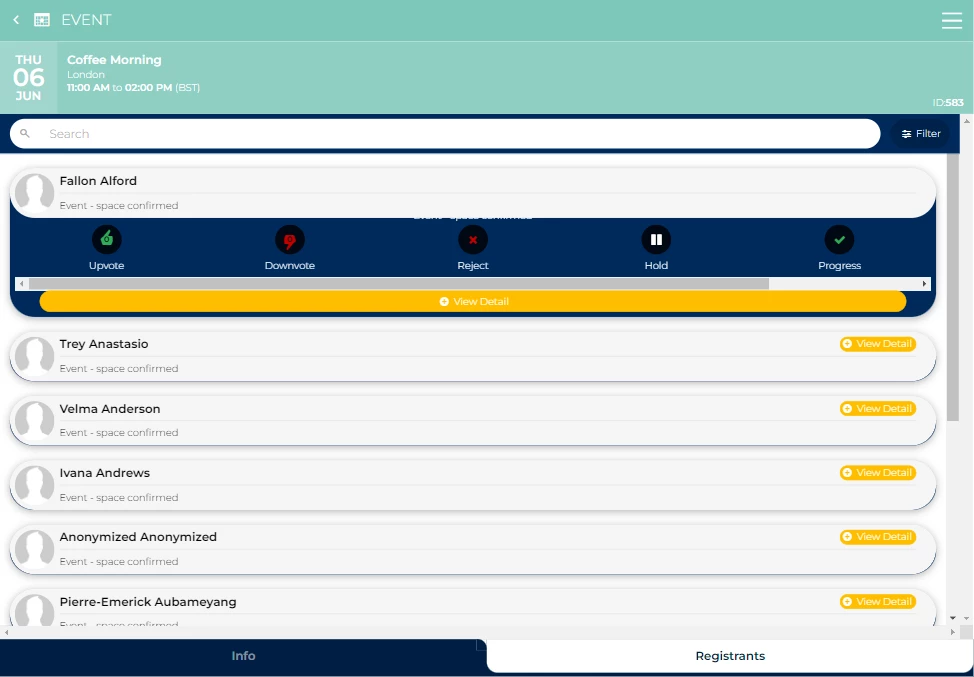
- Registrants tab: Displays the full list of registered candidates. Upvote, downvote, add comments, or tap through to view their registration form and CV.
Self Check-in and registration:
From the event’s info tab, you can enter Self Check-in mode to transform your mobile device into a kiosk for candidates.
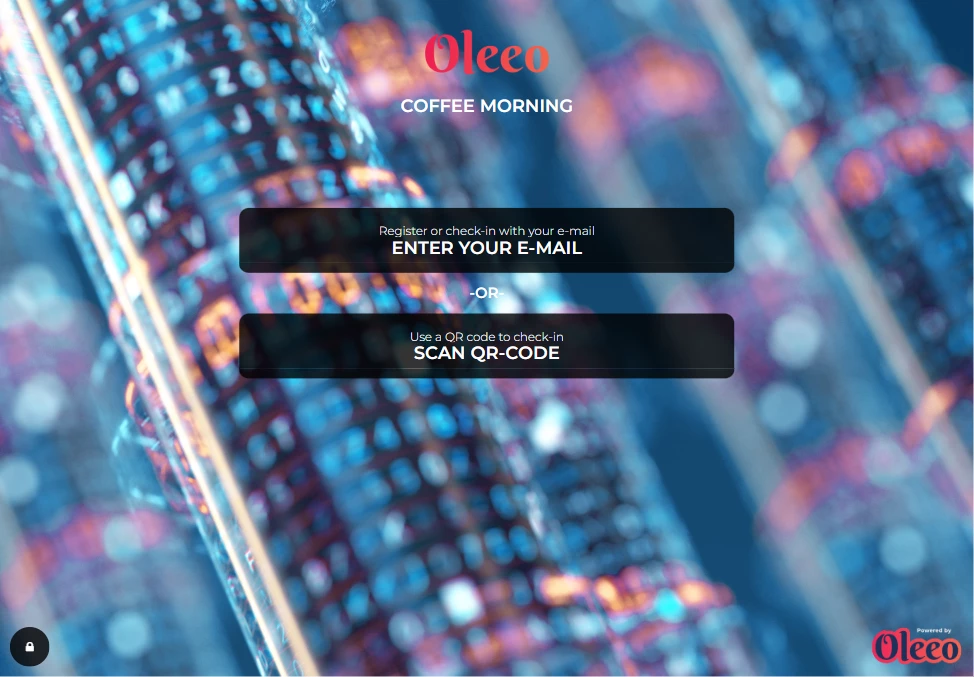
USING THE MOBILE APP FOR SELF REGISTRATION AND SELF CHECK-IN
Event days are busy! Automate repetitive tasks like attendee check-in and registration to free up your recruiters for meaningful interactions with candidates. Our Self Check-in mode streamlines this process, allowing you to focus on other crucial aspects of your event.
Simply turn your tablet into a kiosk, and registered candidates can check themselves in with ease. If you're accepting walk-ins, candidates can register directly at the kiosk upon arrival.
To get started:
-
Locate your event:
- Open the app on your tablet and tap "Events."
- This opens a calendar view of all your events. Tap the event you want to enable Self Check-in mode for.
-
Enter Self Check-in mode:
- On your event's page, tap the button labelled "Enter Self Check-in Mode" below the summary circle.
-
Select a PIN:
- Enter a 4-6 digit PIN of your choice and confirm it.
- This PIN is used to exit Self Check-in mode, so remember it!
-
Choose features to enable:
- Allow QR code scanning: Pre-registered candidates can scan their QR code or enter their email to check in. Their application status will update automatically.
- Allow on-site registration: New candidates can enter their details to register at the kiosk.
- Show candidate list: Displays a list of unconfirmed attendees who can find their name and tap "Confirm" to check in.
-
Tap "Continue" to activate Self Check-in mode.
Candidates check in or register:
- Depending on your selected options, candidates can now check in or self register in using the kiosk.
- Once a candidate has entered their details, the device is ready to be passed to the next candidate.
Self Check-in mode availability after event closure or maximum capacity:
Self check-in and self registration will remain accessible even if the event's closing date has passed, the event is inactive, or the maximum number of attendees has been exceeded.
Leaving Self Check-in mode:
- Tap the lock icon at the bottom left corner.
- Drag it upwards and enter the PIN you set earlier.
