
WHAT IS THE TIP?
💡 Do you have candidates that don't know where they are in the process, or don't read the information within the process status messages and need a visual cue?
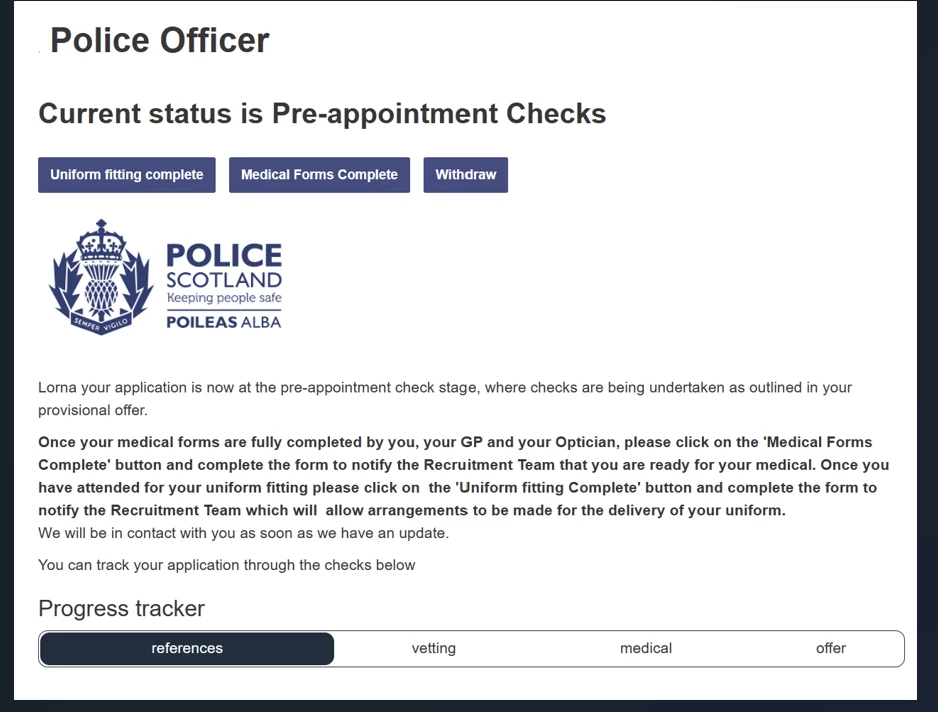
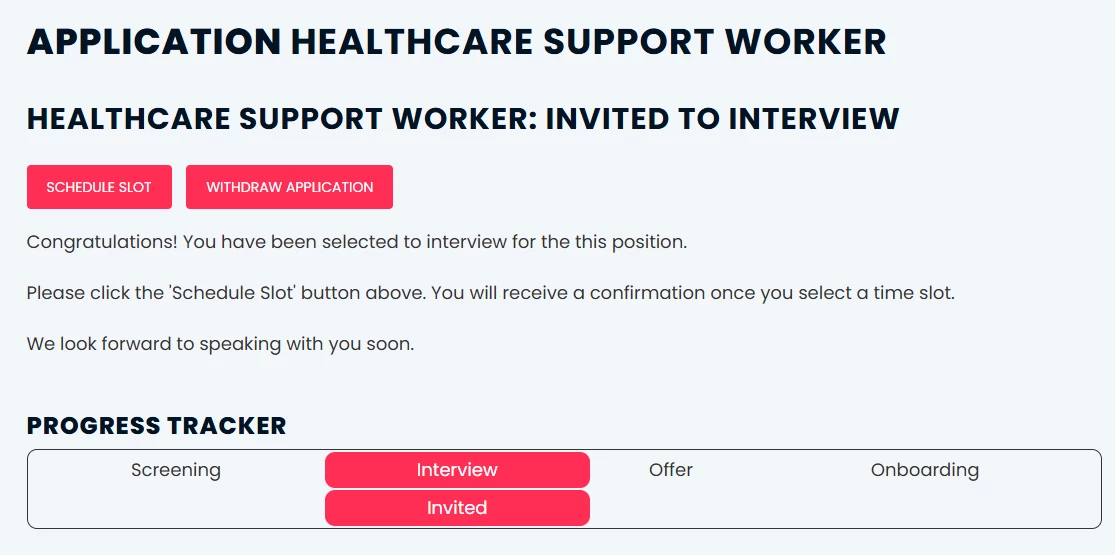
Adding a visual progress tracker into status messages will allow you to visually show a candidate exactly where they are and what stage is next.
Setting it up, as easy as 1, 2, 3
💡 With self configuration level 1, you get access to update the status messages for candidates with any relevant information for that part of the process.
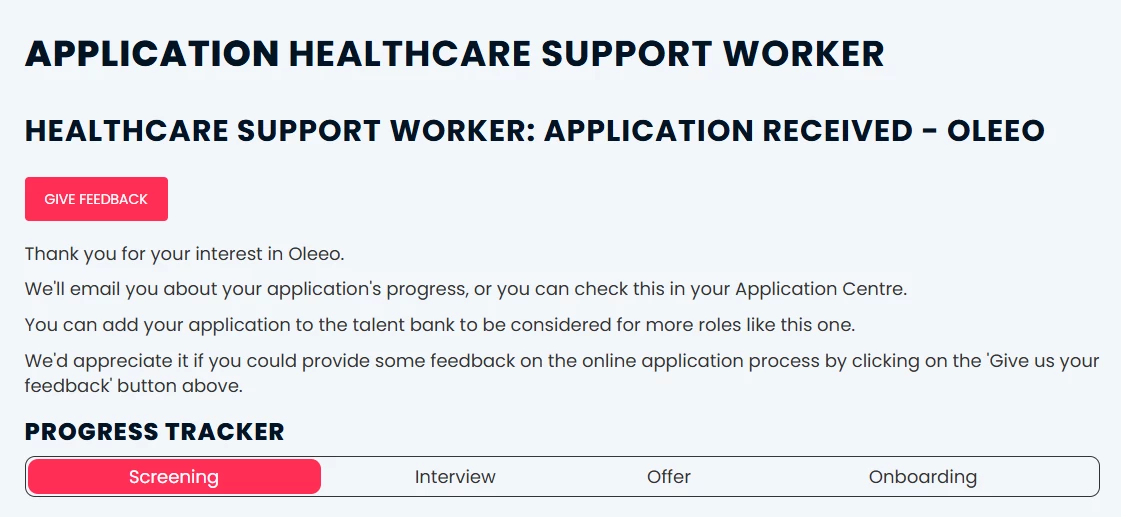
- Define the stages you want to display to the candidate—this could include a complete timeline of the recruitment process. e.g. Screening, Interview, Offer and Onboarding highlighting which one they are at.
- Alternatively, a rolling timeline, keeping the active highlighted stage in the centre and have the timeline move along as they progress, keeping 3 stages visible (past, present and future stage)

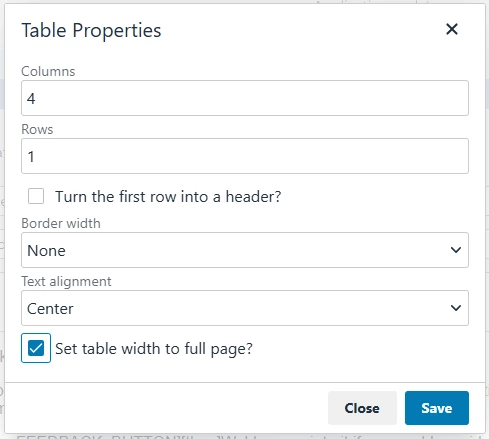
- Create a 100% width table e.g. 1 row and 4 columns (3 columns, if using rolling timeline) at the bottom of each status value description with the defined stages.
- Add CSS styling to the source code of the table to make it visually pleasing, don’t worry if you don’t know CSS, we have provided an example for you to amend below.
Reveal our handy how to guide to build your own 1 row, 4 columns table with styling, as shown in the example.
The styling added to the table will override the candidate portal branding for only this table due to the presence of “!important”.
Update the colours (“background-color:” and “color:”) and wording to match your system.
<h3>Progress tracker</h3>
<table style="text-align: center; width: 100%; border-radius: 10px !important; border: 1px solid; border-collapse: separate; border-spacing: revert !important;" class="mceSimpleTable">
<tbody>
<tr>
<td style="background-color: #f92b53; border-radius: 10px !important; color: #ffffff;">Screening</td>
<td>Interview</td>
<td>Offer</td>
<td>Onboarding</td>
</tr>
</tbody>
</table>
Here is a how to add the tracker code to a new status:
- Copy the code above.
- Locate and edit the status you want to add the tracker to, from Configuration > Process > Status Value.
- Open the source code <> from the text editor and paste in the code as a new line.
- To move the styling of the cell to another stage:
- Copy the code of the Style (e.g. style=”background-color: #f92b53; border-radius: 10px !important; color: #ffffff;”) from the Screening <td>.
- Then delete the styling from the original stage.
- Paste it into the relevant stage’s <td>.
- Save to close the source code window, then save your changes to the status.
📌 Pro Tip: To breakdown the different stages into sub-stages, use another row, by editing the table from the text editor menu.
Like the idea of a tracker with sub-stages? Reveal our handy guide to build your own.
Here is a how to add the tracker code to a new status with sub-stages:
- Copy the code above as before.
- Locate and edit the status you want to add the tracker to, from Configuration > Process > Status Value.
- Open the source code <> from the text editor and paste the code as a new line.
- Save to close the source code window.
- Click into the table and using the toolbar insert a new row after and type in your sub-stages name.
- Open the source code <> from the text editor and copy the code of the Style (e.g. style=”background-color: #f92b53; border-radius: 10px !important; color: #ffffff;”) from the Screening <td>.
Then delete the styling from the original stage. - Paste it into the Interview <td> and your new sub-stage’s <td>.
- Save to close the source code window, then save your changes to the status.

🔧 Use case: Have a lengthy or complex recruitment process and have a lot of queries from candidates from about where they in the process? Then this is for you!
😊 Have you added any custom status messages to help candidates, if so be proud of your work and share your creations.
BENEFITS
- Clear and consistent information presented to candidates.
- Use on-brand colours to highlight progression or where action is required.
CONSIDERATIONS
- Consider what you would want to show unsuccessful candidates. You may choose to remove the tracker.
- Keep it simple, it’s a tracker not a notice board.
- When adding colours consider accessibility friendly colours.
- If you include or exclude stages in the recruitment process you will need to keep these updated.
COSTS
This feature is part of the standard product offering with Self Configuration level 1.
NEXT STEPS
Speak to your Customer Success Manager for further information and/or guidance.