


WHAT IS THE TIP?
💡 Posting vacancies can be time consuming - especially when you’re managing high-volume recruitment and juggling multiple live roles. Every click matters, right? That’s why this week’s tip is a config quick win: Did you know you can automatically post and unpost a vacancy using a process button in the opportunity? With this setup, you can reduce 15+ clicks down to just one! No more navigating through multiple tabs and manually setting up postings - let’s get those roles live faster.
Speed Up Vacancy Postings – Here’s How!
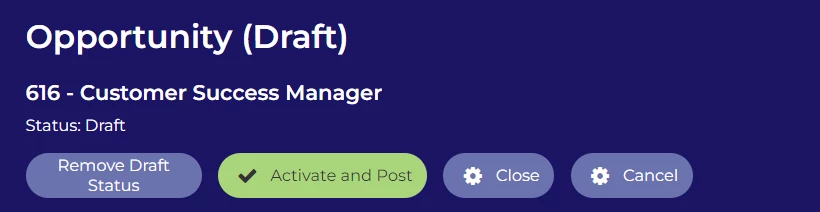
💡 Instead of manually activating each vacancy, navigating to the Postings tab, selecting your job board, filling in the details, reviewing, and then finally posting (phew!) - you can simplify the entire process with an ‘Activate and Post’ button that sits with your process buttons at the top of your vacancy. This button cuts down on all those clicks and updates everything automatically. The best part? The posting automatically reflects your Vacancy Live Date and Vacancy Close Date straight from your Details tab so it’s a hassle-free way to streamline your vacancy management.
🔧 Use case: When managing high-volume recruitment, every click really adds up so this button is a game-changer. It’ll help you get roles live much faster and with minimal effort.
To build this yourself* expand the content below:
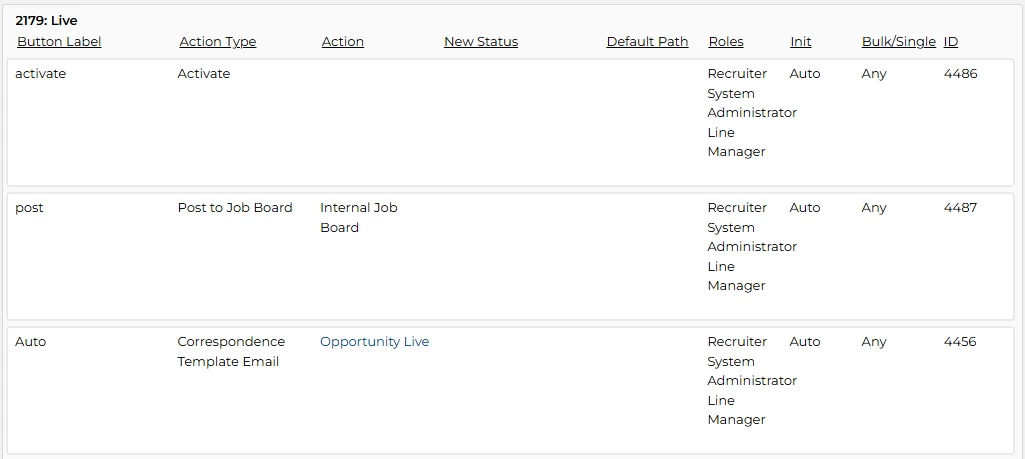
The ‘Activate and Post’ button moves the vacancy to the Live status, Within that stage of the process flow it includes 2 automatic actions.
- Activate: this will automatically activate your vacancy once the status changes
- Post to Job Board: this will post the vacancy to your board(s) of choice. E.g. Internal Job Board
📌Pro Tip: Include an automatic email to to go out at the same time to any stakeholders. E.g. The hiring manager
Below we go over how to build this out step by step:
- Start by creating an action category/group for your new action(s) (Configuration > Action Categories)
- Title = [use an appropriate naming convention]
- Action Type = ‘Vacancy Job Board’
- Give your newly created action category/group an action by selecting the ‘Actions’ tab, press add and selected the ‘Action Type’ and from the ‘Action List’ selected the relevant job board you would like the action to post a vacancy to.
-
Repeat this step to include all job boards you wish to automatically post to.
-
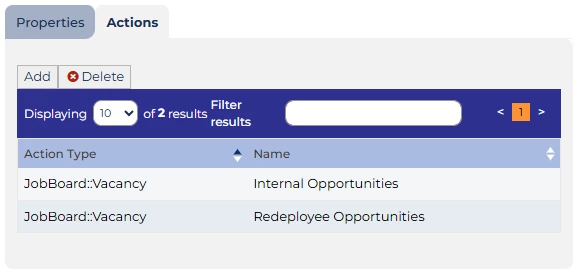
List of multiple automatic job board posting actions
-
- Enter your vacancy process in edit mode, identify which status (it may require a new status to be created) you want to have your automatic actions to take place.
- Press Add Rule
- Your current status will be the status that you identified in step 3,
- Trigger type = Auto
- Roles = [any relevant roles, this will be system specific]
- Button label = [this is not seen in the front end, use an appropriate naming convention]
- Action Type = Activate
- Add Rule
-

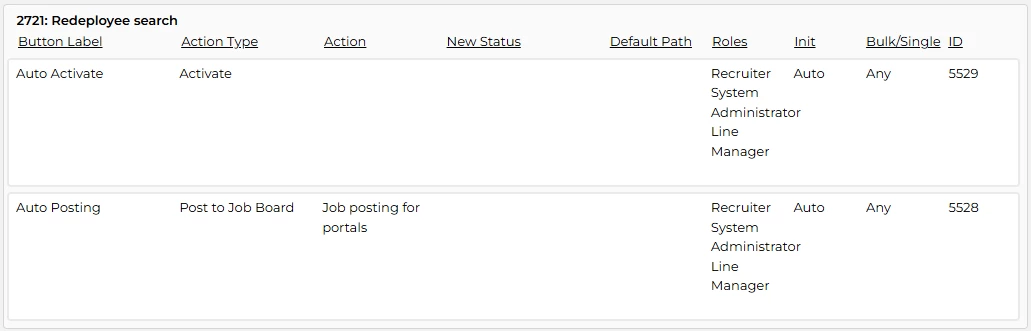
Example of rule required for automatic activation
- Press Add Rule
- Your current status will be the status that you identified in step 3,
- Trigger type = Auto
- Roles = [any relevant roles, this will be system specific]
- Button label = [this is not seen in the front end, use an appropriate naming convention]
- Action Type = Post to Job Board
- Action = [locate the Action Category created in step 1]
- Add Rule
-

Example of rule required for automatic job posting
- Now you have created 2 new actions to ensure they work correctly drag them to the top of any existing actions that are in that status, this will allow it to activate your vacancy and post it to the relevant job boards you selected.
Speed Up Vacancy Unposting – Here’s How!
💡 In a similar fashion to posting, you can build into your process a ‘Unpost from Job Boards’ button to remove the posting without the need to close the vacancy, which can help when it comes to managing the active vacancies with high volumes of submissions.
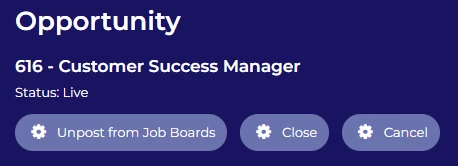
🔧 Use case: Managing vacancies with high volumes can be overwhelming, unposting a vacancy for a period of time can allow to manage candidate expectations and reduce recruiter/hiring manager burden.
To build this yourself* expand the content below:
This action is a manual step in a process, however it could form part of an automatic action when moving through the process.
Below we go over how to build this out step by step:
- Enter your vacancy process in edit mode, identify which status (it may require a new status to be created) you want to have your action take place.
- Press Add Rule
- Your current status will be the status that you identified in step 1,
- Trigger type = Manual
- Roles = [any relevant roles, this will be system specific]
- Button label = [use an appropriate naming convention e.g ‘Unpost from Job Boards’]
- Action Type = Un-post from Job Board
- Action = [locate the Action Category created when setting up job board posting]
- Add Rule
-
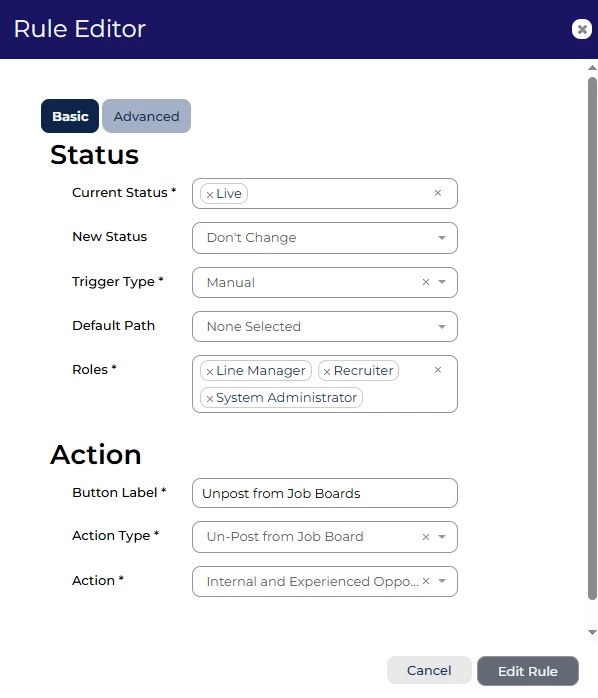
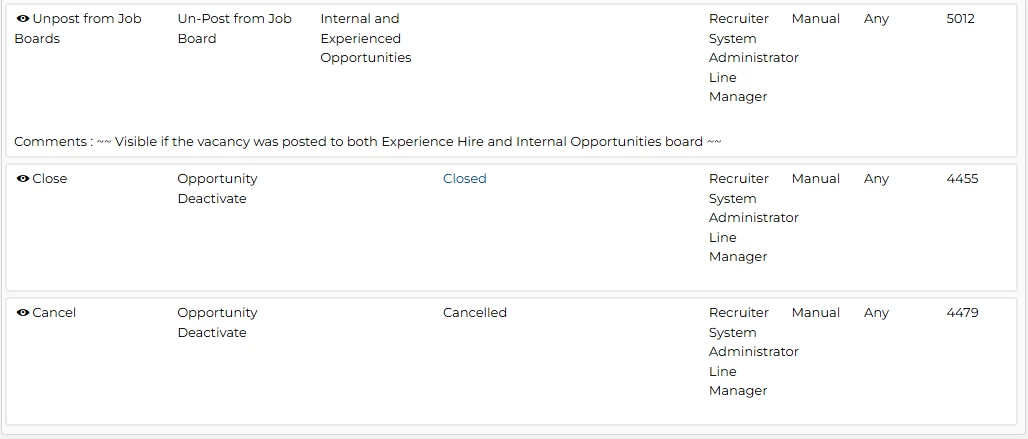
Example of rule required for unposting
😊 If you have any other quick-win tips to share, drop them in the comments below!
BENEFITS
- Huge Time Saver: Post and unpost vacancies with a single button, dramatically cutting down on clicks.
- Fewer Mistakes: Automating this process reduces the chance of posting to the wrong boards, which can happen when posting manually.
- Consistency in Posting: All postings will pull from the Details tab, ensuring your vacancies go live with the right settings every time.
CONSIDERATIONS
- Double-Check Your Details Tab: Ensure that your vacancy live and close dates in the Details tab are accurate, as this information will automatically replicate in the posting.
- User Permissions: Make sure the right team members have access to set up and use the process buttons.
- Separate Internal Postings: If you have an internal job board, consider creating a second button specifically for that, so your internal and external postings are handled separately.
COSTS
*This feature can be implemented via level 3 self configuration - please contact your Customer Success Manager should you wish to discuss how to action this.
Alternatively, please ask a supported user to submit a Change Request on Sugar - our Implementation Consultants will be in touch to provide an estimate and quote.
NEXT STEPS
Speak to your Customer Success Manager or raise a case to our delivery team


