The Advanced Search is a powerful tool that allows you to efficiently search the full population of applications on the system and locate specific types or groups of applications. You can save searches for future use, making it easy to access and track specific groups of applications.
Moreover, application Saved Searches can serve as the data source for various functions, including:
- Generating Statistics Reports in the form of Data Tables.
- Creating charts on your dashboard for quick data visualization.
- Incorporating expandable rows into your customised layouts.
COMMON SEARCH FIELDS
You can search using any field that has been added to the Data Dictionary. This includes fields in candidate application forms, feedback forms, opportunity description forms and system fields. This includes fields that use dropdown lists, date fields and free text fields.
Common fields for defining the Population:
When searching the system, the following fields are frequently used to filter the population. Please note that they may be named differently on your system.
- Submission Date: Use this field to filter the population based on applications submitted during a specific time period.
- Opportunity / Event Title (List): Select the opportunities you want to include in the report from a list. Note: This field might also be labelled as "Vacancy / Event Title (Search)."
- Application Status (List): Use this field to find applications in specific statuses.
- Recruitment Year: If your system involves graduate recruitment, consider filtering based on the "Recruitment Year" opportunity field. It might also be referred to as "Recruiting Season".
CREATING AN ADVANCED APPLICATION SEARCH
- Load the full list of applications:
- From the left-hand menu, select 'Applications' > 'Search'.
- This will load the full list of applications that you have access to.
- Open the Advanced search builder:
- Click the 'Edit Search' button, found in the top-left corner of the page.

Edit Search button on Advanced Search.
- Click the 'Edit Search' button, found in the top-left corner of the page.
- Select your first search field:
- The 'Advanced search' dialogue box will open.
- Click the search box labelled 'Click here to select criteria' and select the first field you would like to use for filtering.
- You'll see a comprehensive list of fields to filter applications. This list includes application form fields, opportunity fields and date fields.
- Fields are organised under headings which indicate where on the system the field is used.
- Start typing a keyword to search the list and find the field.
- Select the field.
- If you encounter any difficulty finding a specific field, reach out to a super user for assistance.
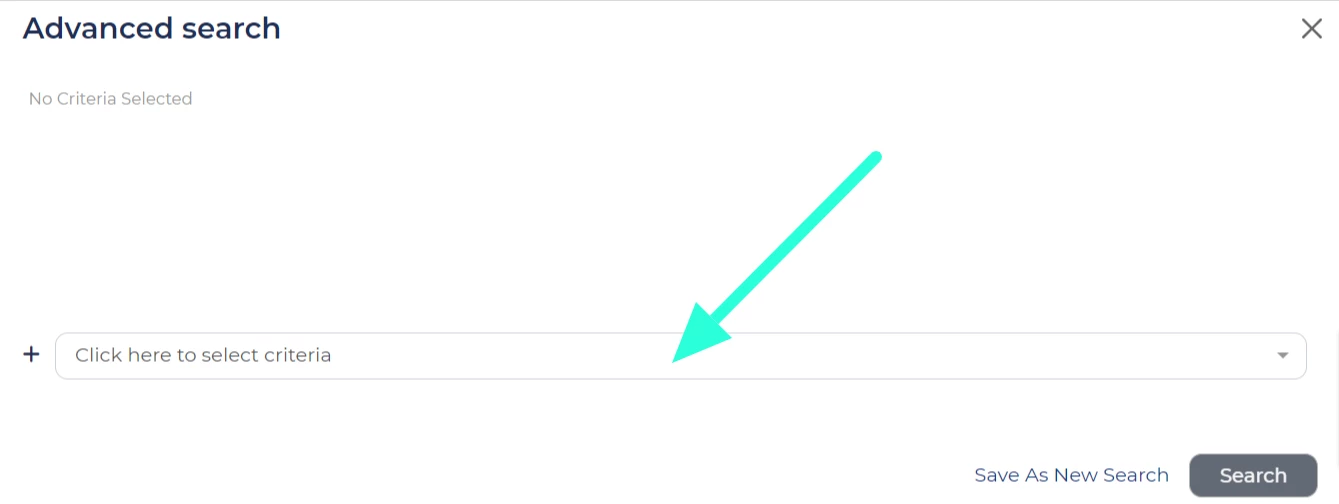
Select search criteria.
- Select the criteria for the field:
- A new box will open where you be asked to select the criteria for your selected field.
- The appearance of the box will depend on if the field is a free text field, a fixed field (e.g. uses a dropdown list) or a date field.
- Enter the criteria.
- You can use the radio buttons to switch from any 'Equals'/Any of' search to a 'Not equal to', 'Is Blank' or 'Is Not Blank' search.
- Click the 'Add Search Criterion' button.
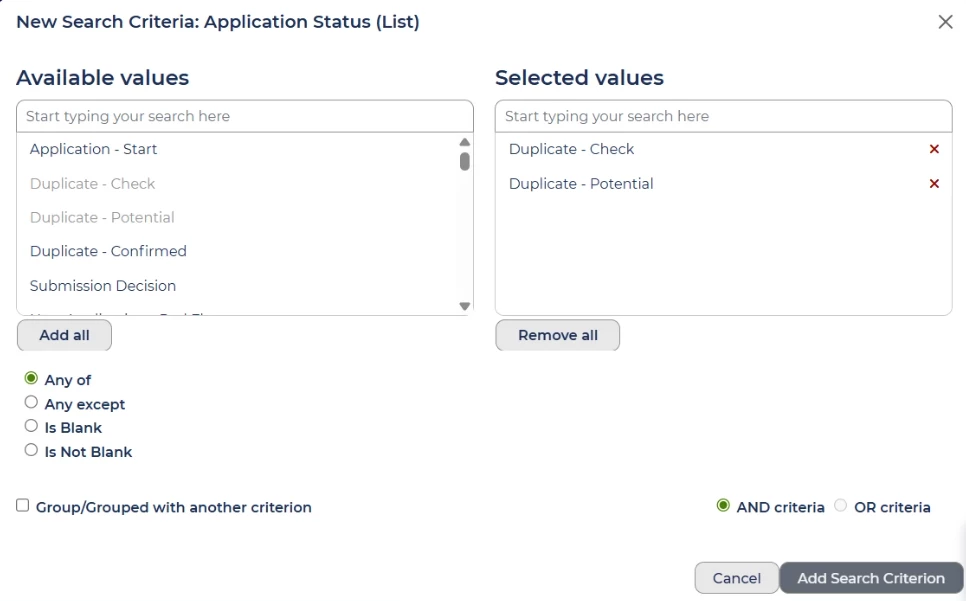
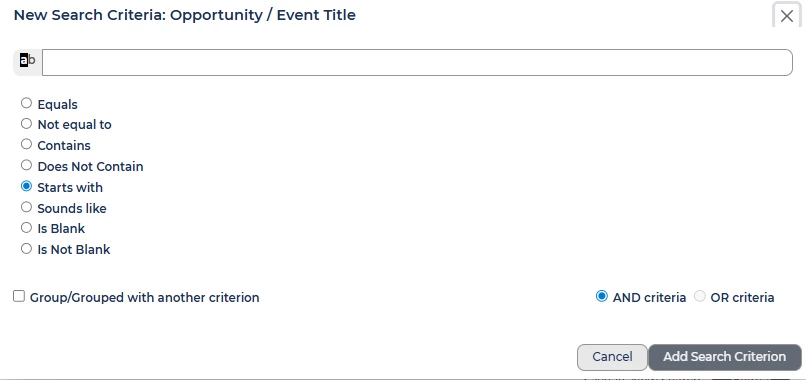
Repeat the process until all the required filter fields have been added and then click 'Search'.
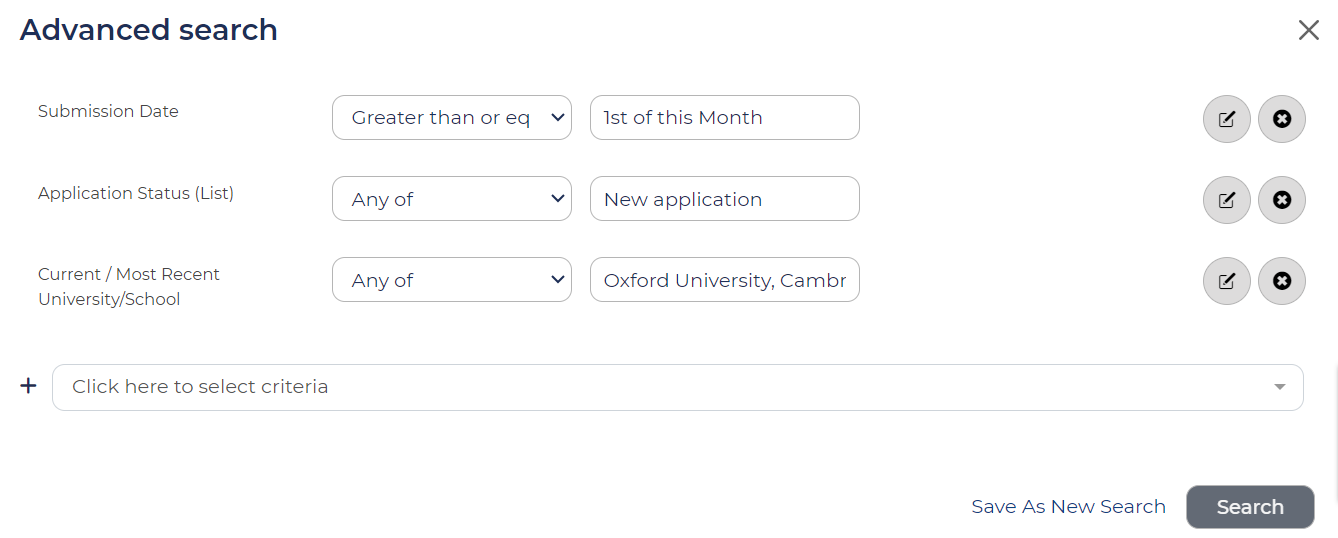
SEARCHING USING DATE FIELDS
In your system, you'll encounter numerous date fields, such as Application Submission Date, Opportunity Live Date, Opportunity Closing Date, and Interview Date (Most recent).
Additionally, for each status, there are two corresponding fields that record the date and time when an application reached the status. These fields are known as 'Time Stamps'.
Specific date vs relative date search:
When selecting criteria for a date field, you have the option to either 'Choose a specific date' from the calendar or define a time period relative to the current date when the search is performed. The dropdown menu offers a range of relative search options, including choices such as "Yesterday", "1 week ago", and "1 month ago". Alternatively, you can opt for a "Custom Period" where you specify the number of Days, Weeks, Months, or Years "Ago" or "From now".
Generally, if you are doing a one-off search it's easiest to select a date from a calendar. Whereas if you are creating a search that you will save and use when reporting or on your dashboard, you probably want to create a relative date search.
Use the radio buttons to determine how the search relates to the criteria:
You can determine how the search is related to the selected dates using the radio buttons:
- 'Less than or equal to': Select this option to search for results before the specified date.
- 'Greater than or equal to': Choose this option to search for results after the specified date.
- 'Between': This option allows you to select both a 'from' date and a 'to' date.
- 'Is Not Blank': Use this to exclude applications that lack a date for the specified field. For example, when searching using the Submission Date, you can use this to exclude applications that have not yet been submitted.
Example: Search for all the applications submitted in the last calendar month:
You could create a search to find all the applications submitted in the last calendar month, save the search and then use it as the data source for your monthly reports:
- Load the full list of applications.
- Click 'Edit Search', to open the Advanced search builder.
- Select the 'Submission Date' field.
- In the new search criteria box:
- Select the 'Between' radio button.
- In the first dropdown, select '1st of last Month'.
- In the second dropdown, select '1st of this Month'.
- Click 'Add Search Criterion'.
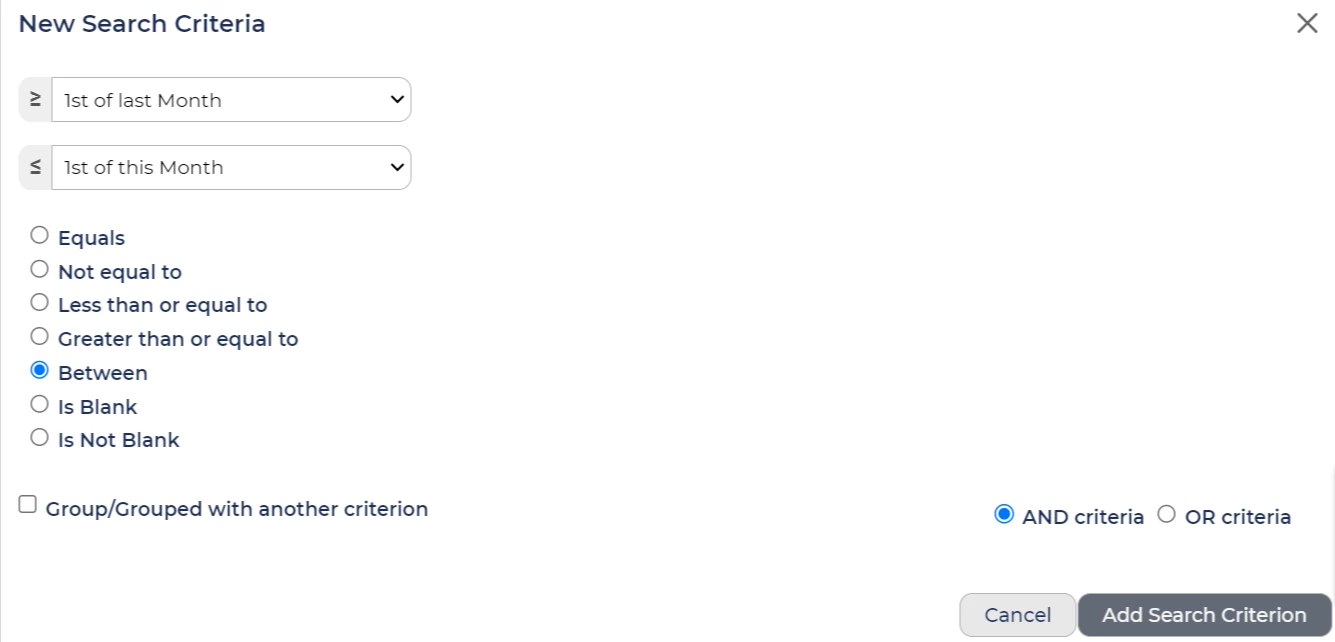
Searching for Applications submitted last month.
- Click 'Save As New Search'.
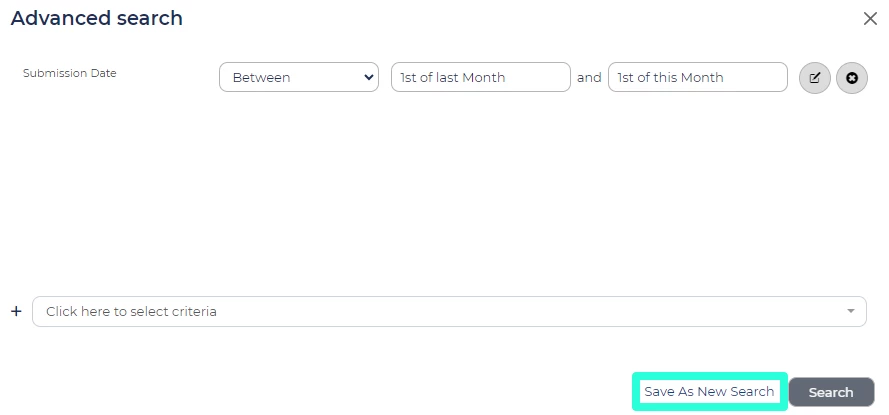
Save As New Search.
CREATING 'OR' SEARCHES
By default, when you add fields to your search, the system performs an 'And' search, meaning it looks for results that meet all the specified fields.
However, you can also create 'Or' searches, which allow you to broaden your search criteria. For instance, you might want to find all applications from candidates who attended a target university OR studied a particular degree. Alternatively, you can use 'Or' searches when you need to search for various answers submitted to a free text field.
Here's how to create an 'Or' search:
- When adding an additional field to an Advanced Search, you'll notice the option to select the 'OR criteria' radio button in the bottom right of the 'New Search Criteria' page.
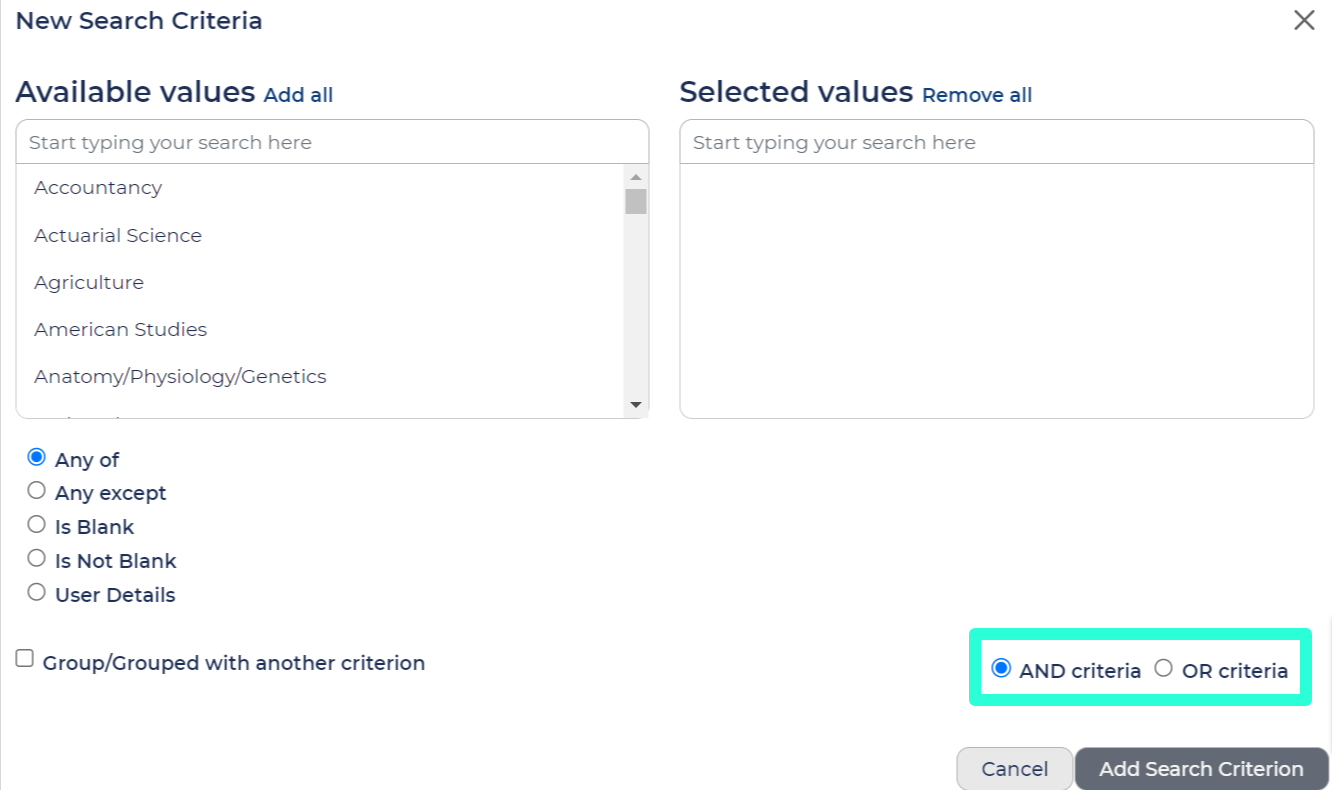
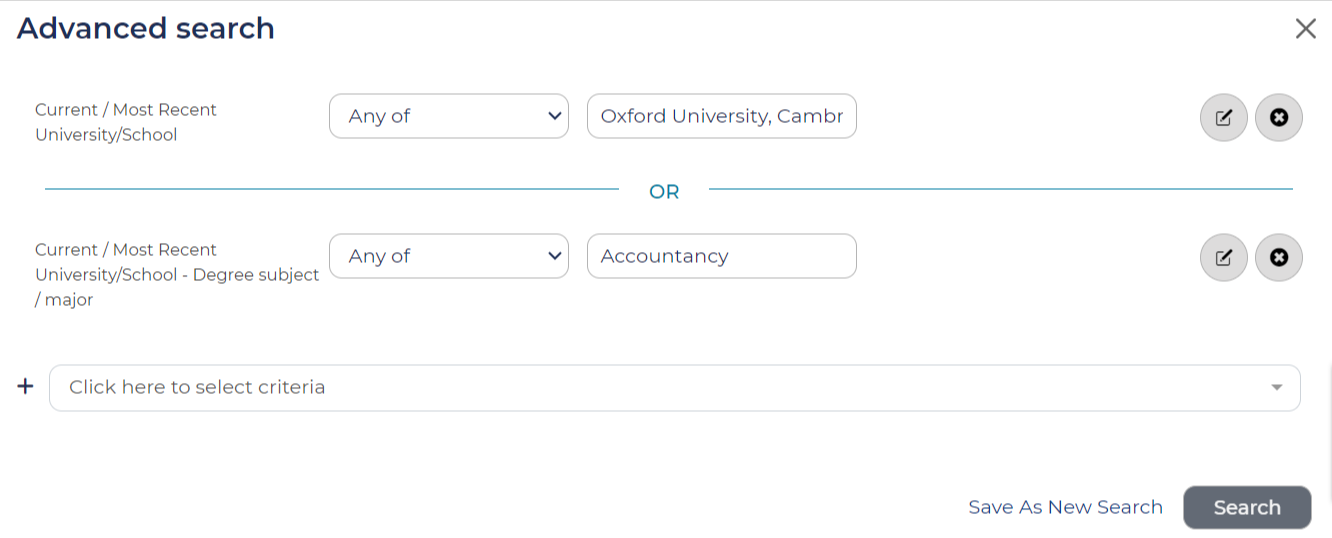
SAVING YOUR SEARCH
- Click 'Save As New Search':
- In the 'Advanced search' dialogue box, click "Save As New Search" located next to the Search button.
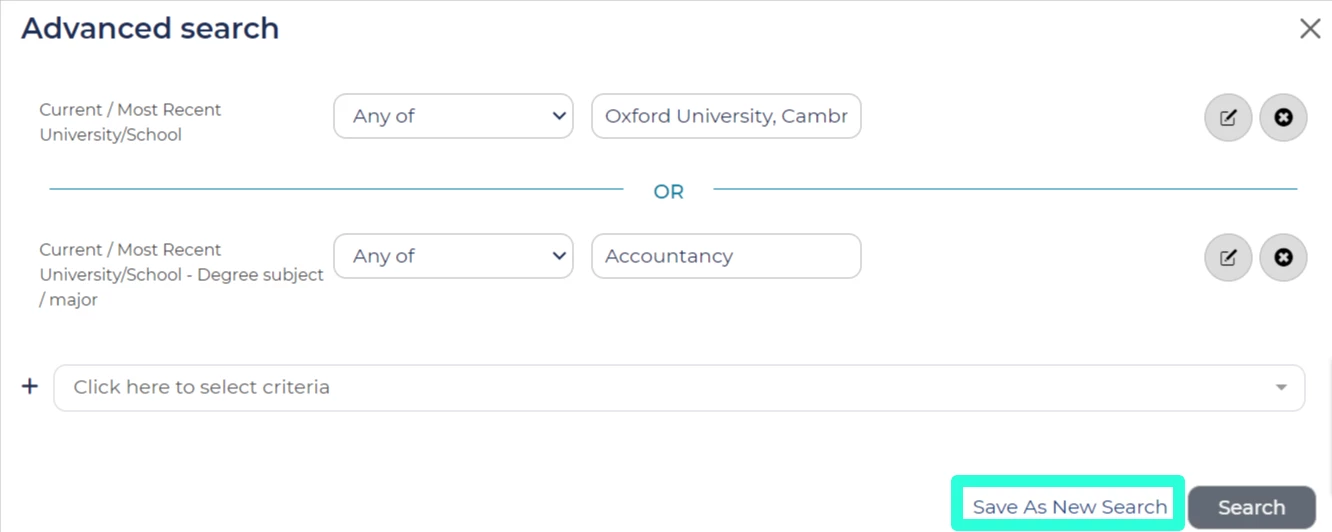
Save as New Search.
- In the 'Advanced search' dialogue box, click "Save As New Search" located next to the Search button.
- Enter the Saved Search's details:
- In the new pop-up box, provide the following information:
- 'Saved search name' - This should concisely describe the criteria of the search.
- 'Search type':
- 'Private' - Choose if you want the search to be available only on your profile
- 'Global' - Choose if you want it to be accessible to all users.
- 'Tags' - If you're managing numerous saved searches, consider selecting a tag to help organise them into categories. If no tags are available, you could consult a super user however it is not mandatory to select a tag.
- 'Add to Dashboard' - To quickly access this search from your homepage, check this box. This will add the results to your dashboard.
- 'Alert me when new applications are modified' - If you select this option, you will receive an email alert every time a candidate meets the criteria of the search.
- Click 'Save' to save the search criteria.
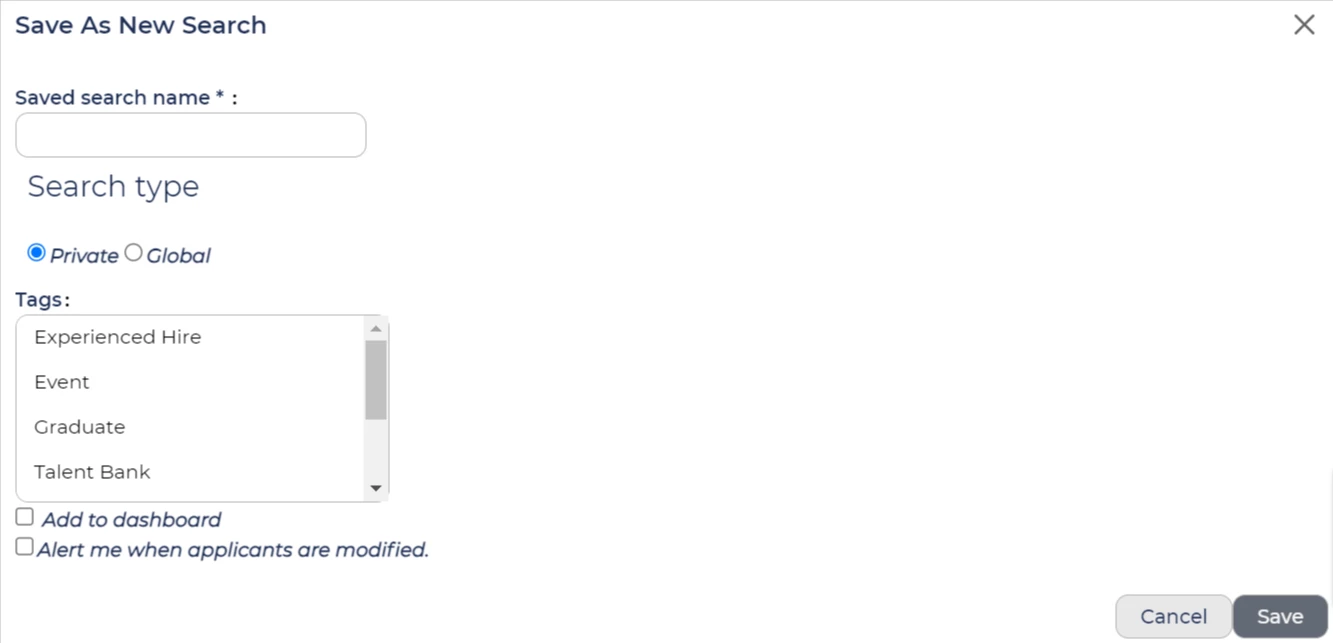
Save As New Search details.
- In the new pop-up box, provide the following information:
Setting up Alerts for prompt attention applications:
Utilise the alert feature to receive notifications for applications that require immediate attention. For instance, you can create a Saved Search to locate applications from candidates requesting assistance due to a disability and configure it to trigger email alerts every time a new candidate submits an application.
LOADING AND EDITING YOUR SEARCH
To quickly access your Saved Searches, utilise the search box at the top of the left-hand menu. Alternatively, you can manage your Saved Searches via My Tasks > View Saved Searches, where you can also modify the properties of your Saved Searches.
Please refer to our comprehensive guide:
Loading and editing a Saved Search


