

You can customise your account settings to fit your style. You can update your name, email, switch profiles, view archived data, change time zones, adjust passwords, switch themes and much more!
ACCESSING YOUR ACCOUNT SETTINGS
- Click on your name at the top of the left-hand menu.

- A pop-up modal will open and the settings will be organised under the 'My Profile', 'Password', 'Theme', 'Additional Details' and 'Preferences' tabs.
- Once you have made a change, click the 'Save' button.

ADDING A PROFILE PICTURE
At the top of the left-hand menu, you'll find your profile icon, which at first displays your initials.

To add a profile picture, go to the account settings page, click your initials, and choose 'Upload' or 'Camera'.
![]()
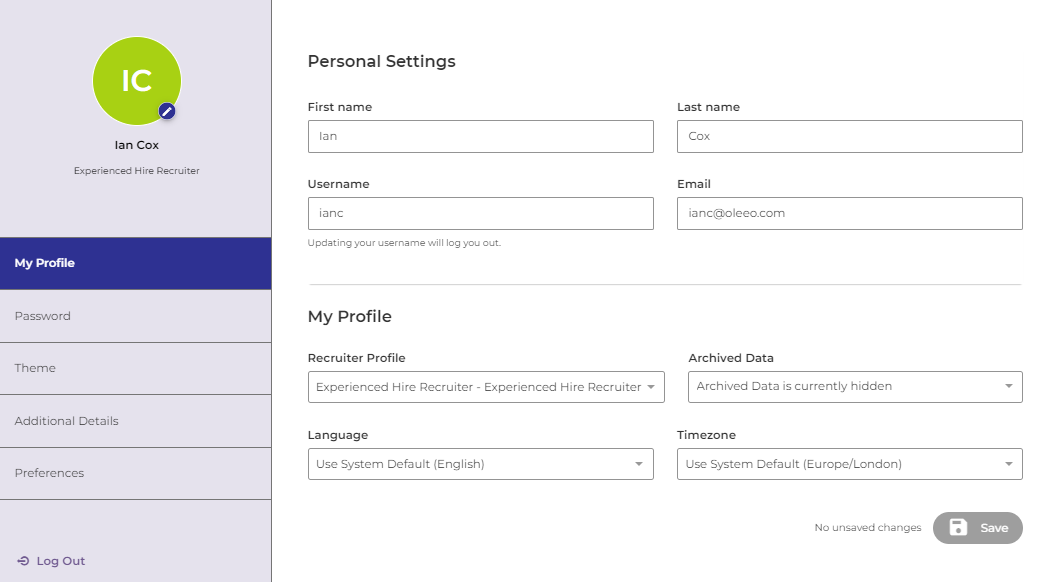
MY PROFILE TAB
The 'My Profile' tab contains the 'Personal Settings' and 'My Profile' sections.
Changing your Personal settings
Under the 'Personal Settings' section, you can change the following details:
- First name
- Last name
- Username
Updating your username will log you out.
Changing your Profile settings
Under the 'My Profile' section, you can adjust the following options:
- Recruiter Profile:
- Access all profiles available to you from this dropdown.
- If you have multiple profiles (e.g., Recruiter and Hiring Manager), easily switch between them using this dropdown.
- Archived Data:
- Archiving an opportunity hides associated applications, helping you focus on active campaigns.
- Set this field to 'Hide' for regular use and 'Show' when generating historical reports.
- Language:
- Change the display language if your ATS supports multiple languages.
- Timezone:
- Your system has a default timezone, but you can change your account to match your current location. This adjustment will affect how times are displayed to you in the system.
CHANGING YOUR PASSWORD
- To change your password, navigate to the Password tab.
- You will be asked to enter your current password and select a new one.
- The password criteria are displayed below the 'New Password' field.
- Changing your password will require you to log in again.
CHANGING YOUR THEME TO HIGH CONTRAST
To customise the visual appearance of your account, navigate to the Theme tab.
Here, you can switch between the default 'Radial Blue' theme and 'High Contrast'.
The high contrast palette has a simplified colour logic with consideration to colour-blindness, luminosity, and inversion.

ADDITIONAL DETAILS TAB
The fields available in this tab are configurable on a system-by-system basis.
This tab can be set up to record user details such as job title, employee ID and work phone number.
PREFERENCES TAB
The 'Preferences' tab contains the 'Accessibility' and 'System Behaviours' sections.
Changing your Accessibility settings
Under the 'Accessibility' section, you can enable the following options:
- Keyboard Focus:
- Provides a highlight or animation when navigating through forms or selected areas using the Tab key.
- The animation highlights the field tabbed from and to.
- Tab Focus:
- Applies an additional highlight to the selected tab when viewing areas of the system that use tabs.
- Examples of pages that use tabs are the Application Summary and opportunity pages.
- A box will be applied around the tab's label text to help discern it from unselected tabs.
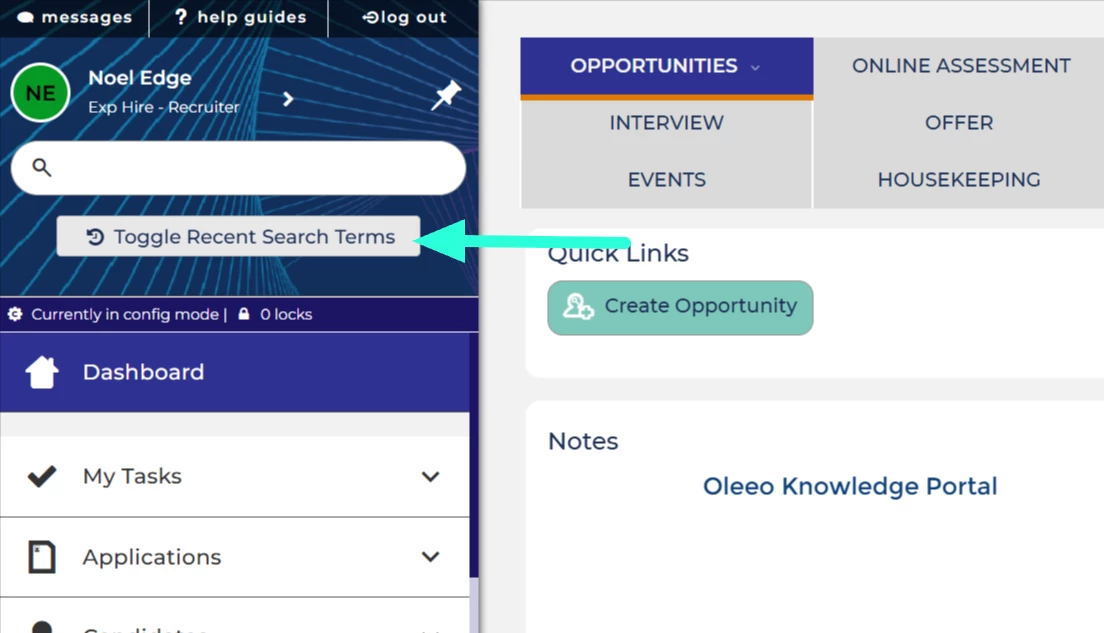
- Recent searches are accessed using button:
- Default Behavior: When you click inside the search box at the top of the left-hand menu, a list of your last five searches (including the time they were run) automatically appears.
-
When Enabled: The automatic dropdown is disabled. Instead, a button labeled "Toggle Recent Search Terms" will appear directly below the search box.
-
How to use: Click the "Toggle Recent Search Terms" button to reveal your recent history. You can then click on any previous search term to re-run it instantly.
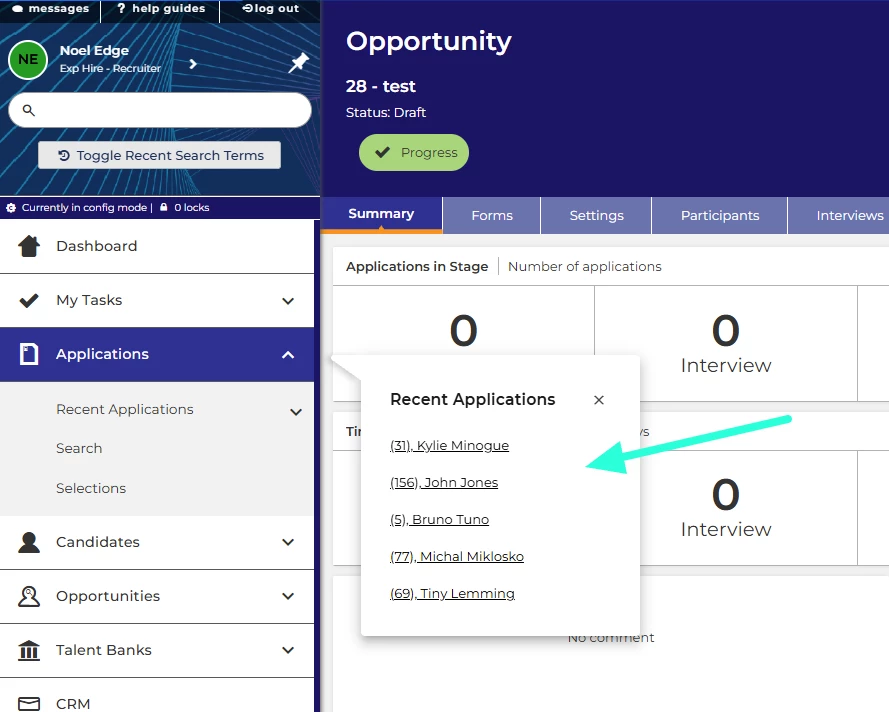
- Remove popout lists of recent items from left-hand menu:
- Default Behavior: When you click on a main menu heading (such as Applications, Candidates, or Opportunities), a "speech bubble" pop-out appears next to the menu. This bubble lists the last five records you viewed in that category.
-
When Enabled: The pop-out speech bubble is completely removed.
-
How to access recent items: You can still view your history by clicking the specific "Recent [Category]" link (e.g., Recent Applications) located directly under the main menu heading.
-
The Result: Instead of appearing in a pop-up bubble, the list of recent records will display directly within the left-hand menu structure.
Changing the System Behaviours
In the 'System Behaviours' section you can set the following options:
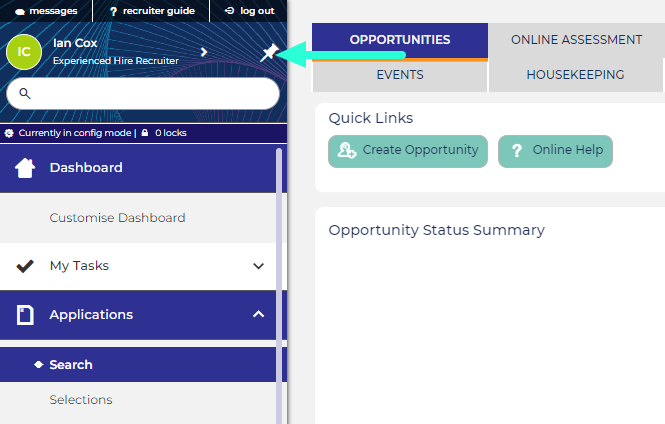
- Menu Always Pinned:
- This option ensures that the left-hand menu is always maximised for easy access.
- You can also change this setting by clicking the pin icon to the top-right of the left-hand menu.
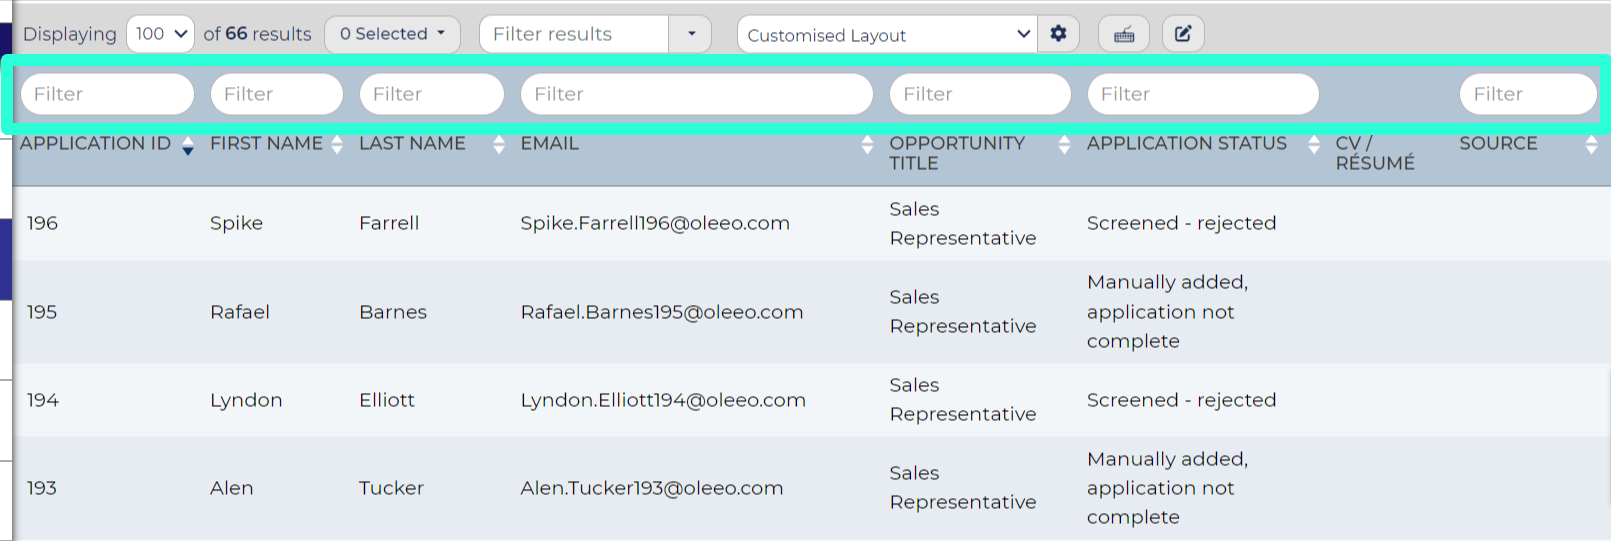
- Save datatable column filters between sessions:
- When you're viewing lists within the system, you have the option to 'Show Column Filters'.
- Enabling this behaviour setting ensures that the system will continue to show/hide column filters even if you exit the list and return to it later or switch to a different list.
- This streamlines your experience and saves time when working with lists.
- Notification popup duration:
- When you complete some actions on the system, a notification box pops up.
- This setting allows you to select how long notifications appear on the screen.
- Date/time format:
- This setting empowers you to decide how dates are presented to you. You can select either the Month/Day/Year format or the Day/Month/Year format.
- Additionally, this setting governs the format of dates when you export date fields from the system, ensuring consistency in your data handling.


